Once you are in, the next step would be to add your users. Head over to the hamburger menu and press ADMIN.
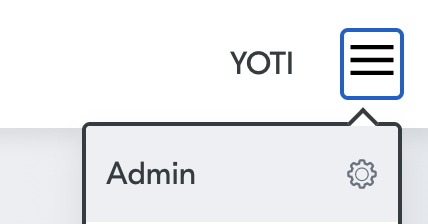
Click User management.

Click Add user
Enter the users email address.
Select the permissions you want to give the user.
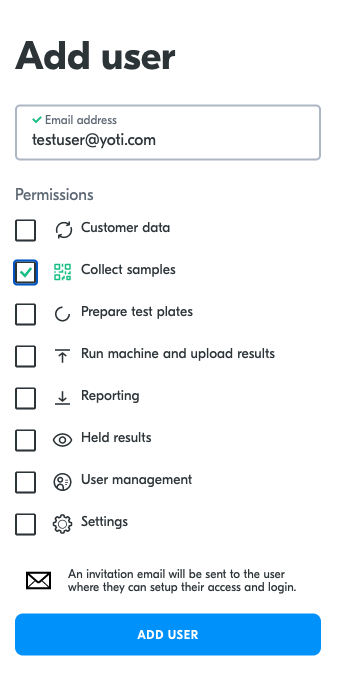
The different levels of access are described below:
Access Role | Description |
|---|---|
Customer data | A user can upload a csv with customer data that have pre-registered to be tested. |
Collect samples | A user can collect a test sample and capture personal information to link a customer to their sample. |
Prepare test plates | A user can allocate test samples to wells in a testing plate, in preparation for testing the samples in a machine. |
Run machine and upload results | A user can take an exported data file from a test machine and upload it to the portal for processing. |
Reporting | A user can view all test data and download test data currently stored on Yoti’s secure servers. |
Held results | A user has access to the held results area, where they can manage customer test results currently on hold for review. |
User management | A user can manage all user accounts and permissions in the portal. (This should only be given to someone who acts as an administrator for your portal) |
Settings | A user can access all the configuration settings for the application. (This should only be given to someone who acts as an administrator for your portal) |
After the user is created, you’ll be brought to a screen where you can view the user in the users table. The user will receive an invitation email that directs them to the create account screen in the portal. They can use their Yoti app or create a password to get access to the application.
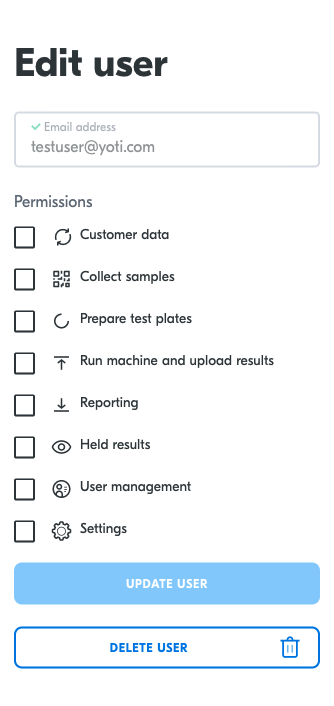
Edit a user
Modifying user information and permissions is easy in User Management.
Hint You won’t be able to edit a user’s email address as this is associated with testing and cannot be changed.
Select Admin and then User Management.
Find the user in the user list or search using their full email address.
Click the ✏️ edit icon.
Make your changes and click Update user to finish.

Disable a user
You can disable a user’s account to prevent them from using the portal:
Select Admin and then User Management.
Find the user in the user list or search using their full email address.
Click the 🚫 Remove all permissions icon found under the Permissions column.

Delete a user
If you have a user that no longer needs access to the portal, we recommend that you disable their account rather than delete them. Disabling a user's account will prevent the account from being used, but it will also preserve that user's history of activity.
Select Admin and then User Management.
Find the user in the user list or search using their full email address.
Click the ✏️ edit icon.
Select Delete user button.