The first stage is to collect a sample from the customer being tested. The following steps are performed by a person collecting test samples.
Start collecting
From the dashboard, select Start collecting to start your collection session.
A session enables you to capture customer test samples one at a time. You can collect as many test samples as you want during your session.
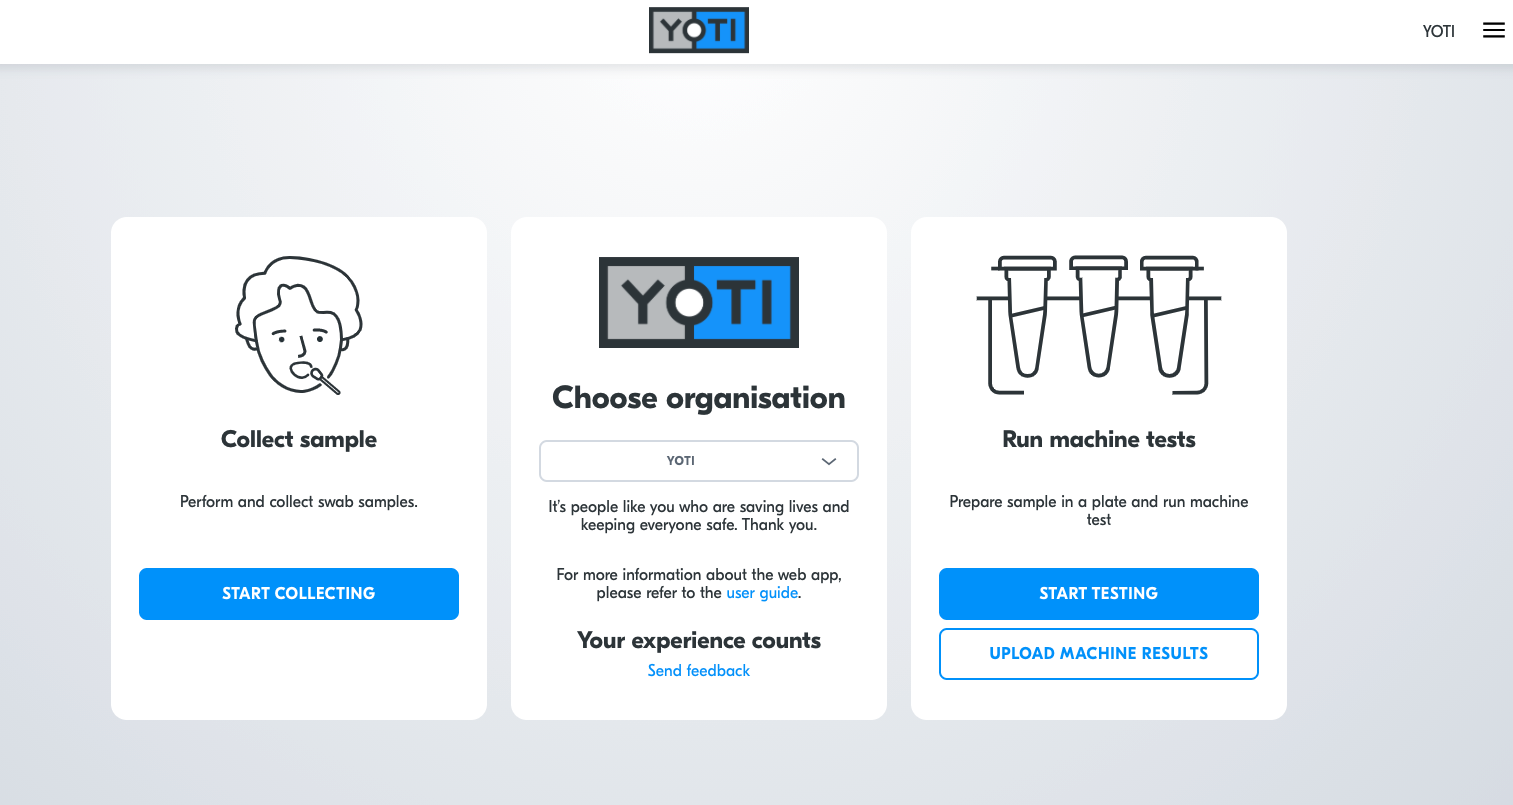
Start collecting
Scan QR code
Please select Allow when the portal asks permission to access your device’s camera. Scan the QR code on the front of the sample collection bag to link the bag.
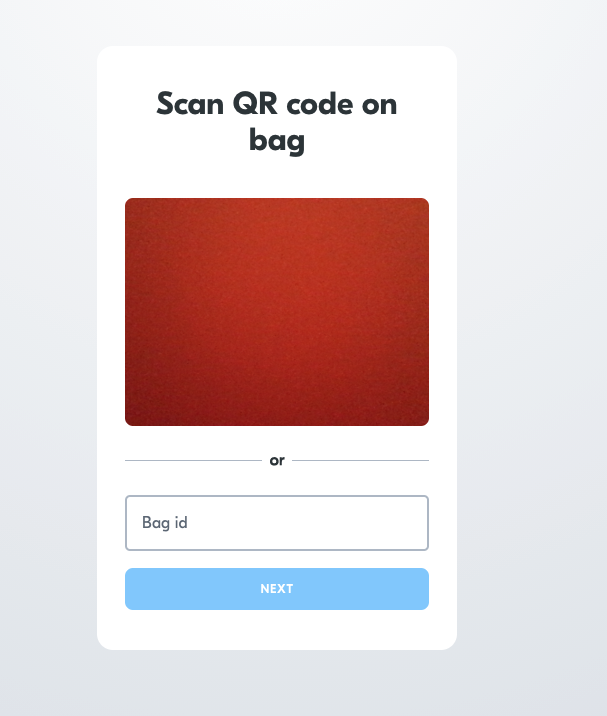
Start collecting > Scan QR code on bag
You are also given the option to enter a BAG ID manually. Yoti has implemented a feature to install YOTI scanner extension on mobile and desktop and Offline scan functionality (after the first scan).
Collect data
The customer can choose how they would like their test result sent to them. They can:
- Issue it to their Yoti app on their phone.
- Pre-registered
- receive it by email; or
- fill in paper form
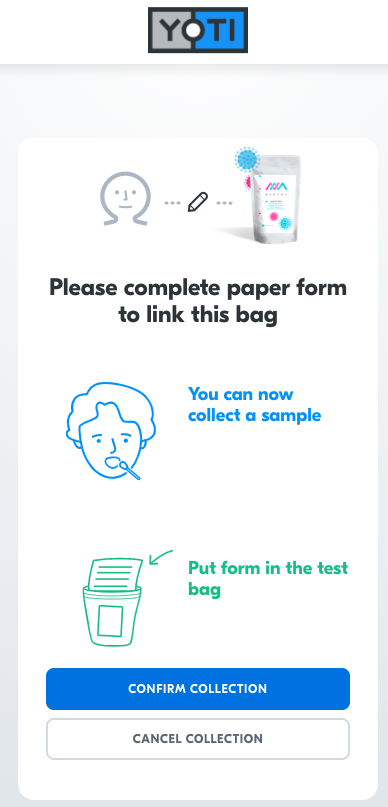
After you have got the customer details down you will need to confirm collection.
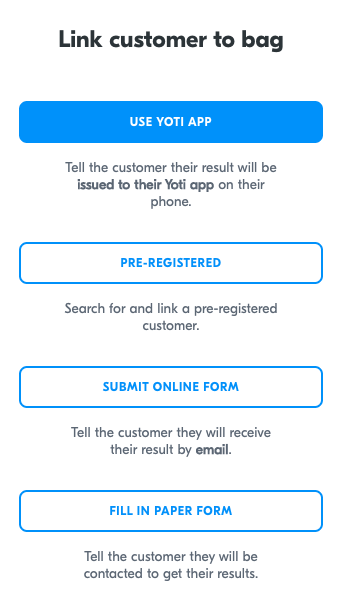
Start collecting > Scan QR > Options
Option 1: Yoti App
For results to be delivered to the Yoti app, select Use Yoti app and ask the customer to scan the on-screen Yoti QR code. This will automatically link the sample bag and the customer Yoti profile.
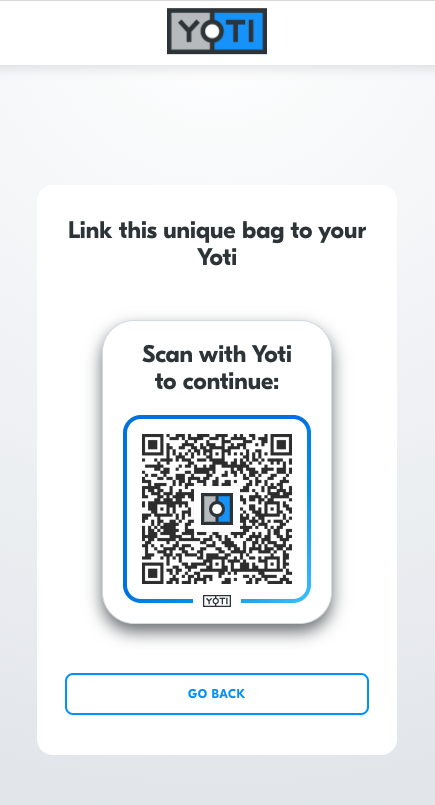
Start collecting > Scan QR > Options > Yoti App
These are the attributes you selected in your admin section.
Option 2: Pre-registered
If the customer has already pre-registered you can search their date of birth, or email or full name to find.....
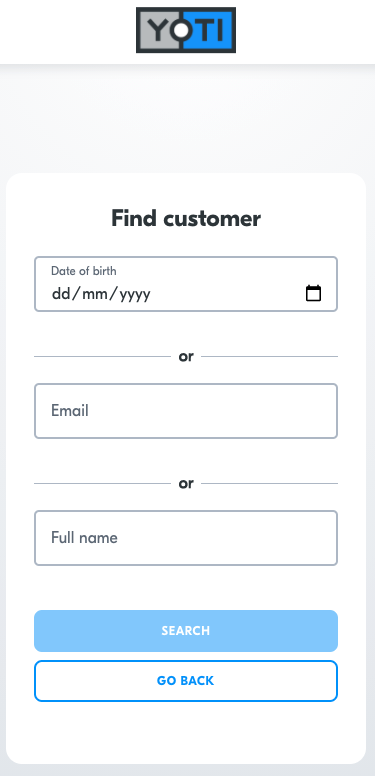
Start collecting > Scan QR > Options > Pre-registered
Option 3: Submit online form
You will need to submit an online form with some customer details. Enter the customer’s full name, email address, plus any additional details requested by your organisation.
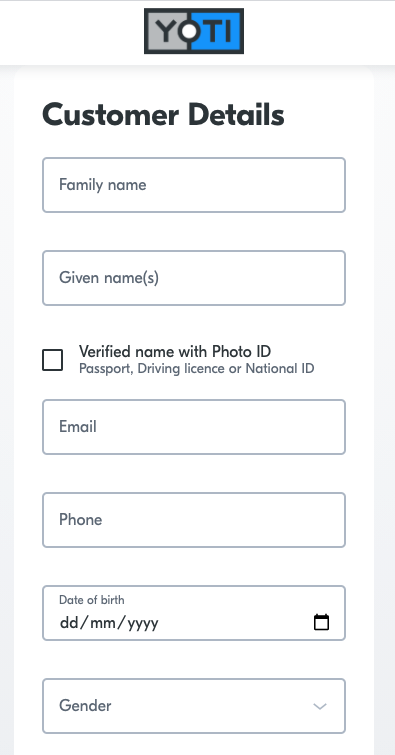
Start collecting > Scan QR > Options > Submit online form
A summary of the customer details is presented in a larger text size. Please show this screen to the customer from a safe distance and ask them to confirm that these details are correct. If there is a mistake, select No, make changes to return to the online form.
Option 4: Fill in paper form
Ask the customer to fill in the form and hand it back to you when they are done.
Start collecting > Scan QR > Options > Fill in paper form
If a customer has chosen Yoti app or Online form, and the Symptom questionnaire is enabled, you will be asked to complete a symptom questionnaire on behalf of the customer. This does not affect the customer’s test result and can be skipped.
Symptom questionnaire
If this is ticked in your admin section you will be presented with a symptom list.
If a customer has chosen Yoti app or Online form, you will be asked to complete a symptom questionnaire on behalf of the customer. This does not affect the customer’s test result and can be skipped.
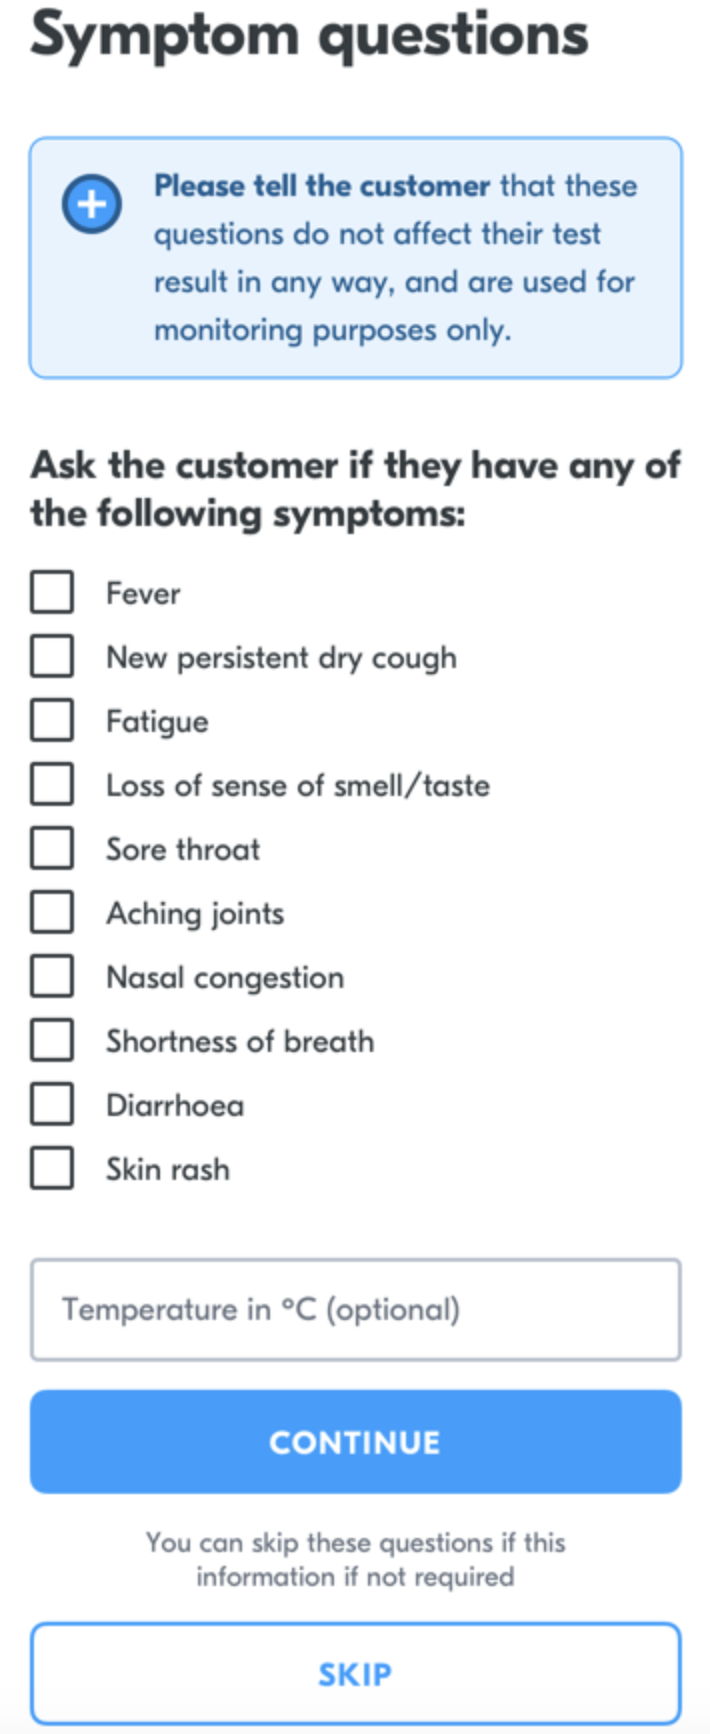
Start collecting > Scan QR > Options completed > Symptom questionnaire
After the symptom questionnaire (if selected) the customer’s test sample has been successfully collected and linked.
If you are finished with your collecting session, click the Yoti logo.