Yoti provides you with a simple dashboard management tool called Yoti Hub to get you up and running with our products. The Yoti hub allows you to generate your API keys, add your billing information and more.
Once your organisation has been created, our onboarding team will aim to review your application within 2-3 business hours. We will send you an onboarding email once your account is verified.
To start integrating our products, you will need to:
Set up an account on the Hub and get verified.
Generate API keys.
This section walks you through how to complete this. You will need to know information about your organisation, key contact details and billing details.
If you don't have this to hand, don't worry, you can return anytime to continue with your application.
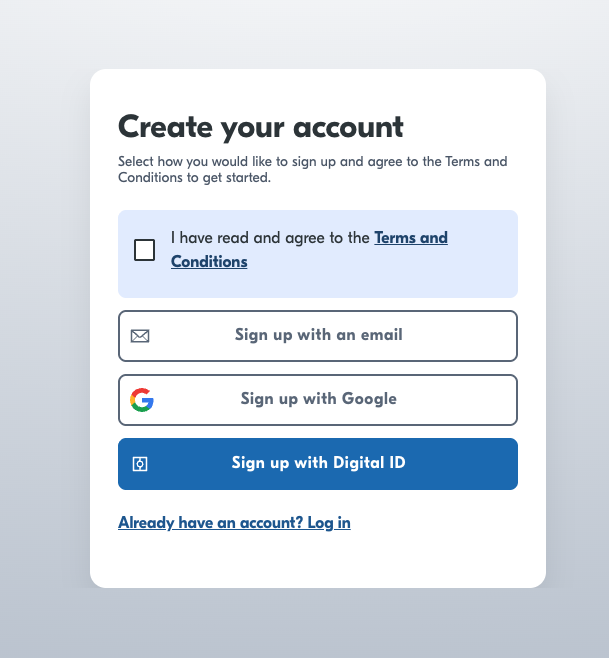
Create your business account
Get access to Yoti Hub here
You will be directed to a screen, where you can register an organisation or log in to an existing one:
Registering a new organisation will first require you to create an account on the Yoti Hub. You can use the Yoti digital ID app to create an account; sign up using Google or use an email, password and a multi-factor authentication app.
Once your Hub account is created, there is a short form to fill out. We aim to verify your account within 2-4 hours. If we have any questions about your application, we will email you. You will receive an email if all is approved.
Congratulations, your account is set up and you should see the screen below! At this point, you will also receive an email from Yoti welcoming you on board.

As the applicant, you will instantly gain full access to your organisation's Yoti Hub account. You can go ahead and create a service from this point.
We appreciate that your organisation details may not remain the same as when you first registered. If you need to change any information, please contact us at organisations@yoti.com so we can update it. This ensures that we can verify any changes and keep information aligned.
Now you just have to create your service to generate API keys, and you're ready to start integrating.
Generate API Keys
You will then need to create an application to obtain your API keys. You can do this as follows:
Head to the left hand nav bar and select services > create a service.
Or select the blue button labelled CREATE.

Then pick which service you are integrating, in this case - Digital ID.
Each service has a different set-up, so make sure you have selected the correct one. You can create multiple services within your organisation, where in each service refers to a domain and has its own user base.
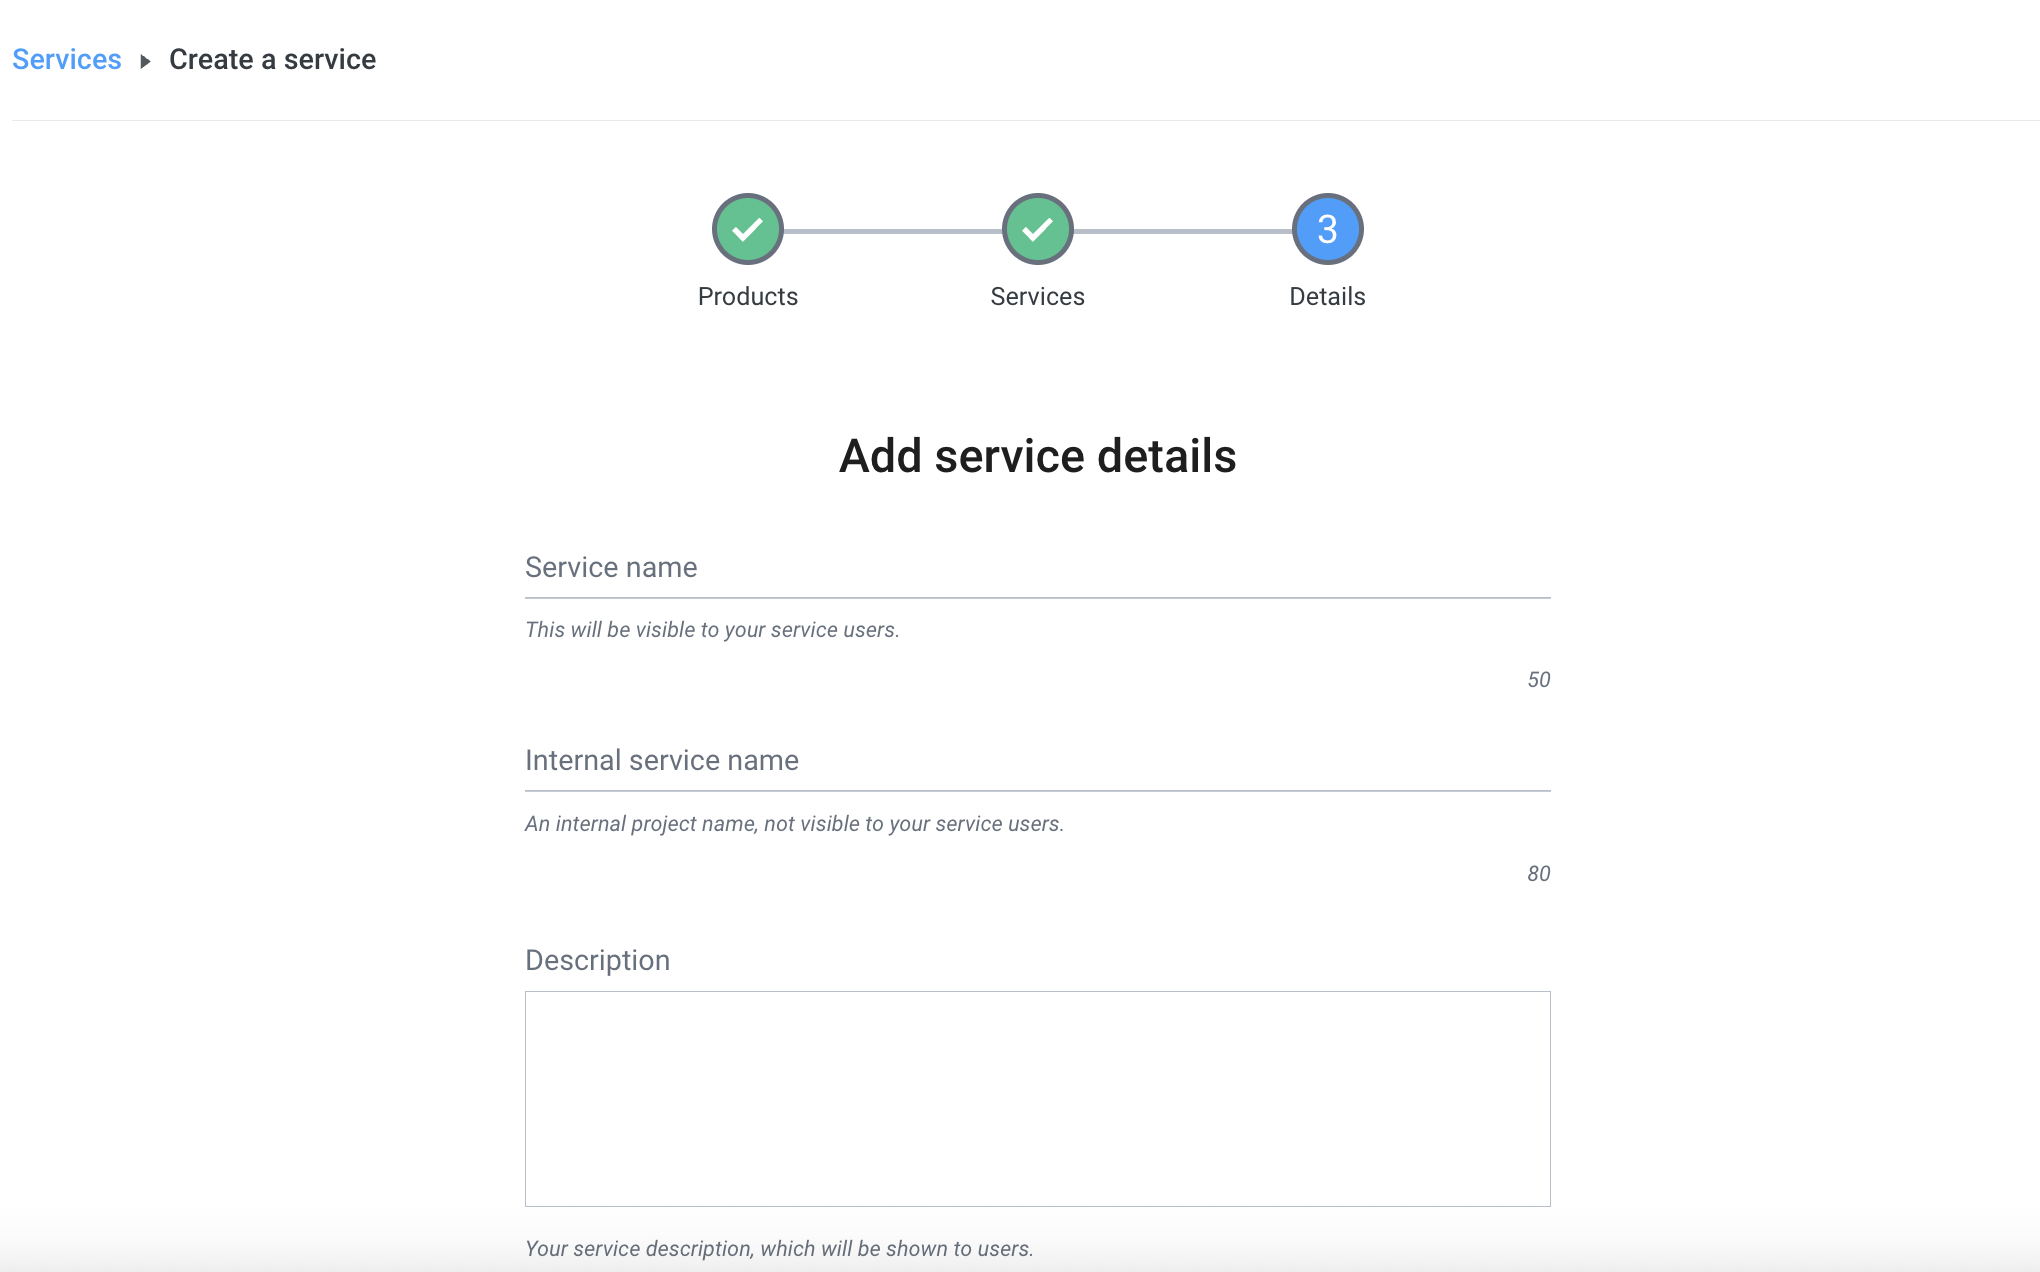
Once you have selected a service, you can create the service by filling in the following details:
Form | Description |
|---|---|
Service name | This will be visible to your users on the Digital ID app. |
Internal service name | An internal project name, not visible to your users. |
Description | Your service description, which will be shown to users if you choose to integrate the connect QR code only. |
Domain | The website domain your service will be used on. Invalid TLDs such as .test or .local are not supported. |
Privacy policy | You are legally required to provide information to users on your personal information collection and use practices. This could be through your privacy policy, terms and conditions or another method. |
Background image | Your QR code background, which will be shown to users if you choose to integrate the connect QR code only. |
Logo | Your logo will be shown in the Digital ID app and also in the receipts generated. Max 200kB file size, PNG only. |
Callback URL | Where your clients will be forwarded after the share is completed. |
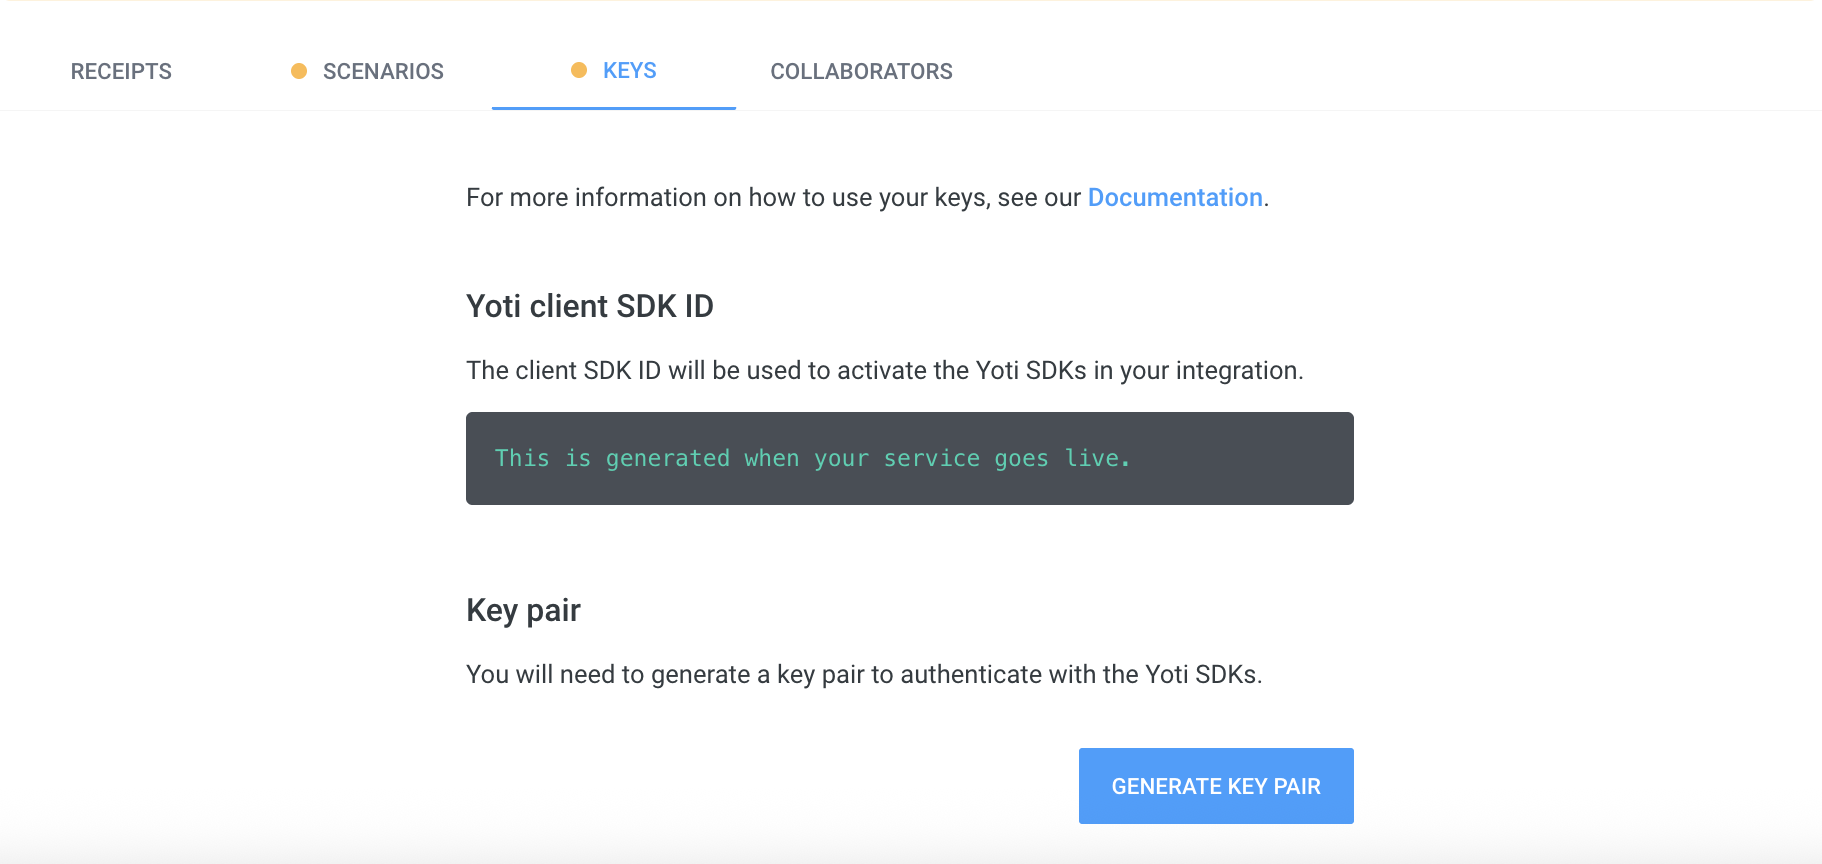
The next stage is to generate SDK ID and the key pair for your service.
Key | Description |
|---|---|
Yoti Client SDK ID | You will need this on your backend to initialise the SDK and it is passed in each call to our servers. |
PEM file | You need to download a PEM file containing your private key in order for your app to connect with Yoti. • Click the Generate key pair button in the Keys tab to download. • Please keep this safe as this PEM file is essential to a Yoti integration. If you lose or corrupt your PEM file you will be able to generate a new one. Regenerating your key pair will break your current application by invalidating your current PEM file and generated keys. This means you will be unable to decrypt new tokens until these are replaced by the newly generated ones. |
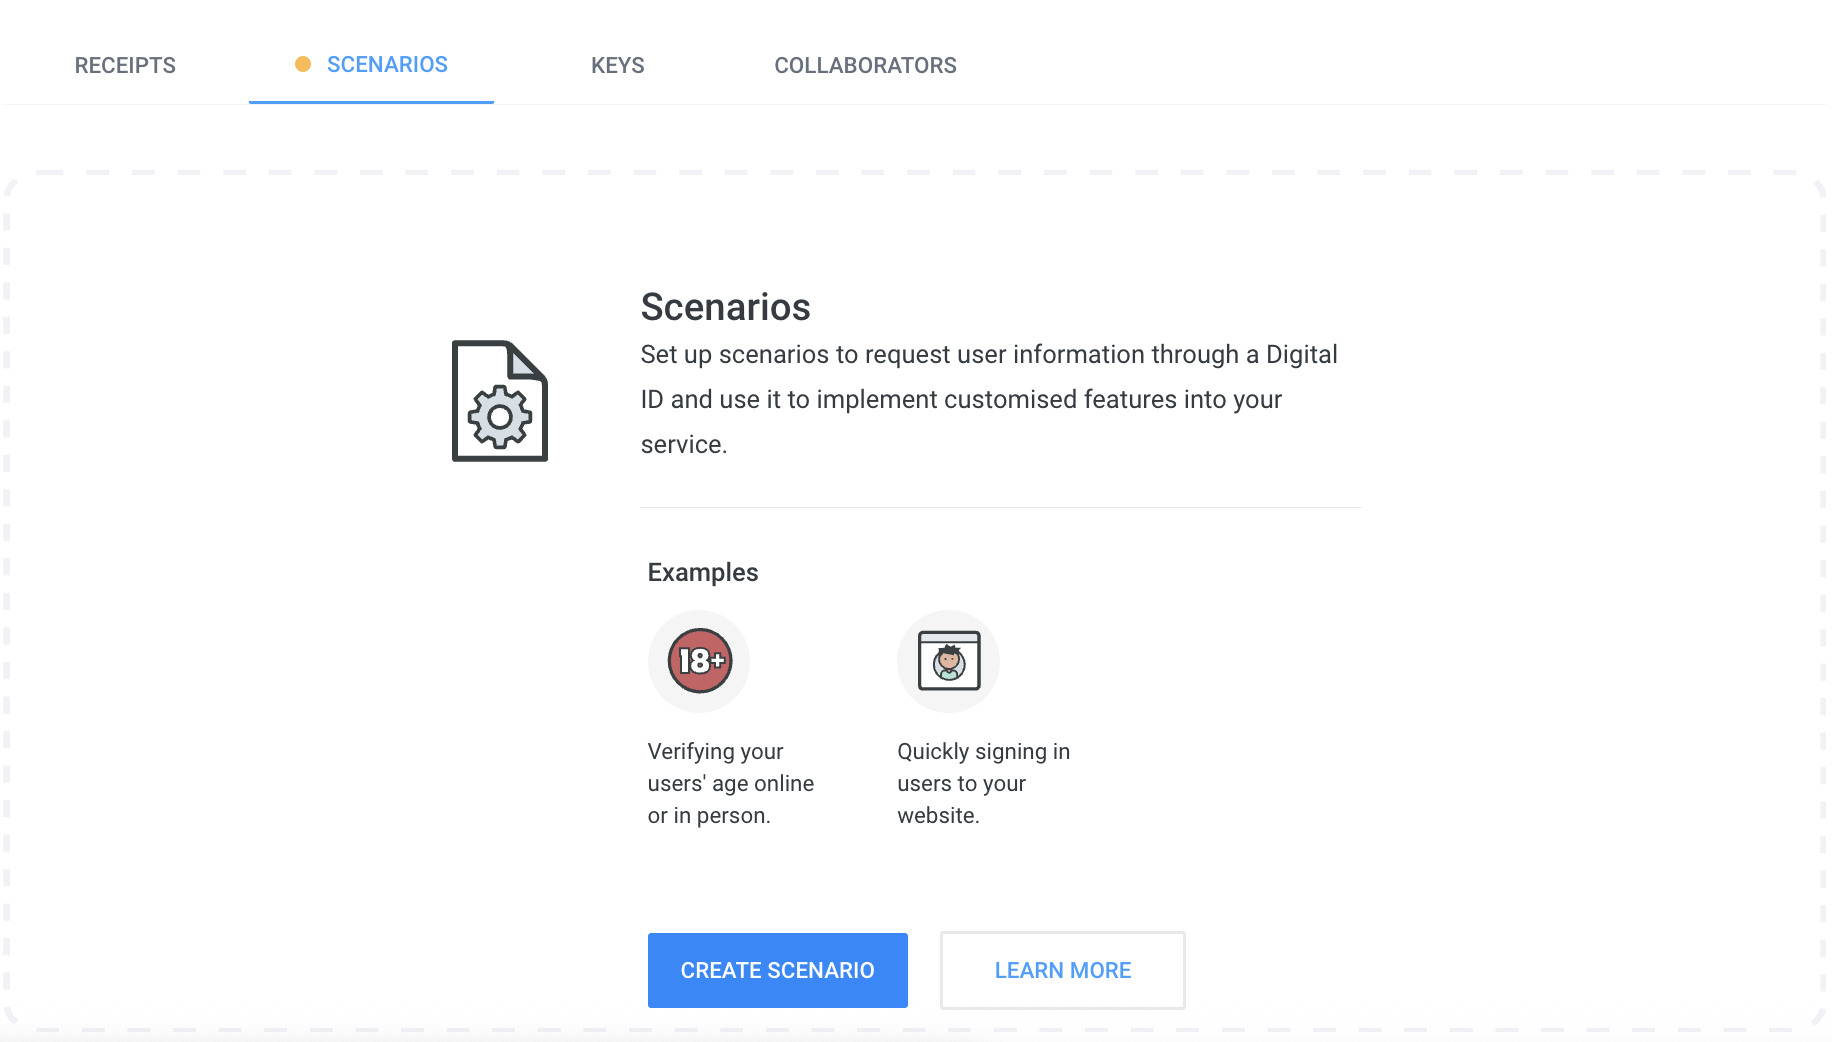
Create a scenario
Once the keys have been generated a scenario will need to be created, this is where you can select the attributes that the user will send. When creating a scenario, you will also need to specify a callback url that a user can be redirected to after they have used their digital id.
Once you have completed the above steps, you will be able to activate your Yoti service by clicking the Activate button in the top right.

Access control
By default, as the applicant of the organisation, you will have full access to your organisations account. You will have the ability to add members to your organisation.
Permissions let users perform certain actions within organisations, applications and pages.
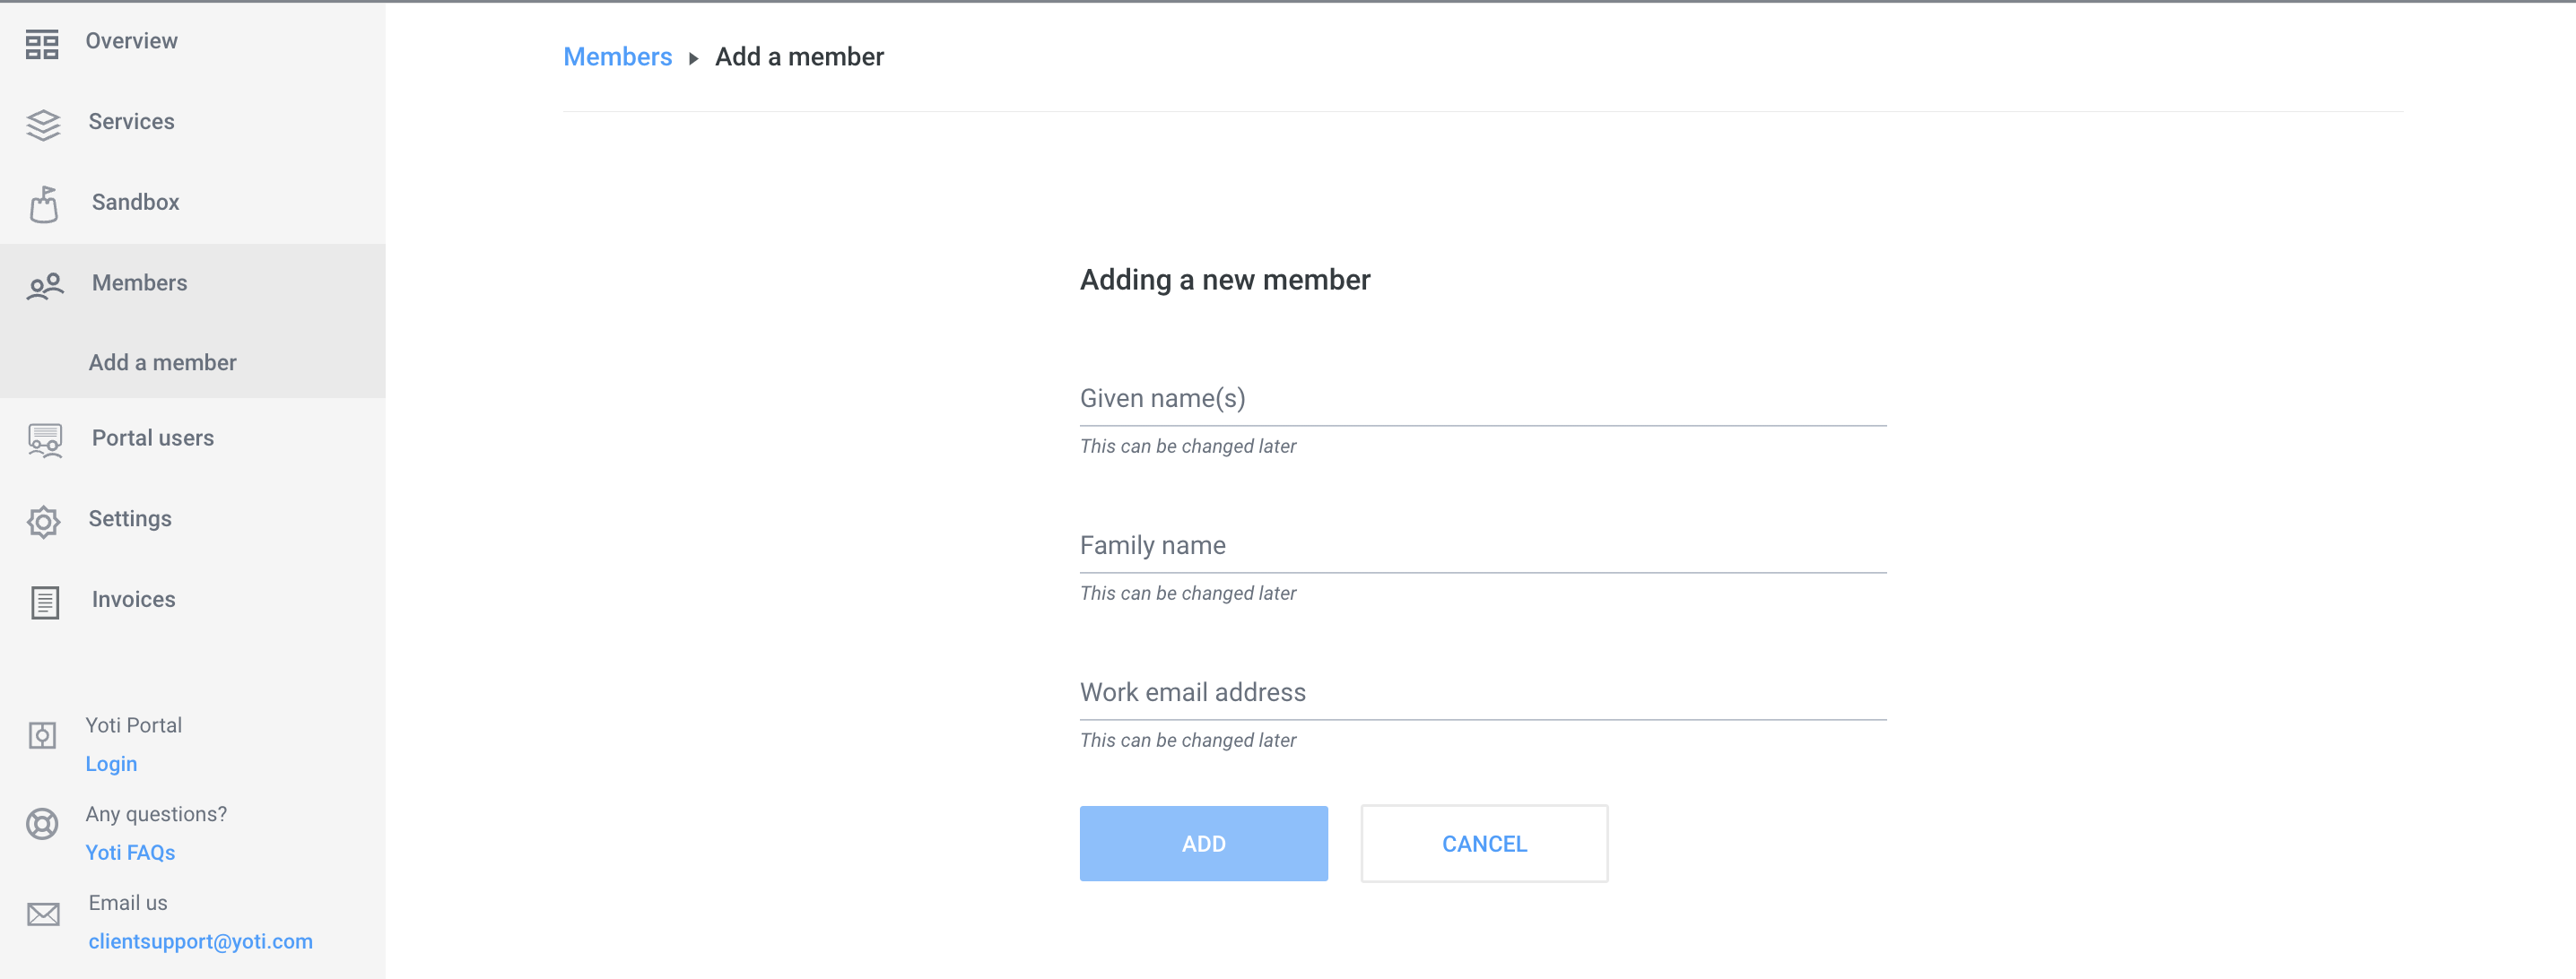
To add members, log in to your organisation and go to the side menu and click Members:
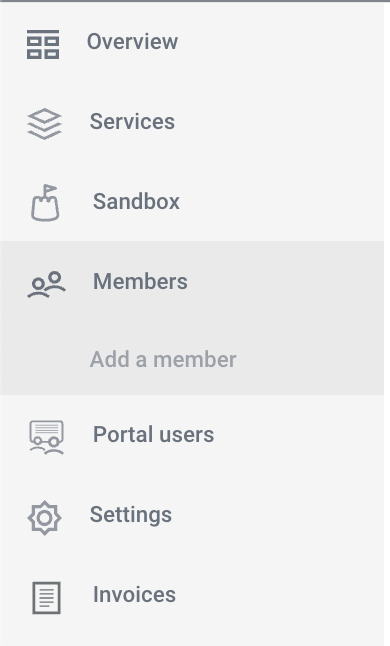
Click Add a member and fill in the details - please make sure the email address you use to invite a colleague to your organisation is the same as the email address they have added to their Yoti.
Once you have completed this the user will receive an email and will gain access to your Hub account when they scan the QR code sent to them.
Hint We strongly recommend you add another user to your Hub account as a backup user in case you lose access to your Yoti account.
Organisation Permissions
You need to be an admin to assign organisation permissions to users.
When a user gets invited to an organisation, they don't have any permissions by default. But they can still accept the invitation and access the organisation.
An organisation admin is able to give permissions to a user from the Permissions tab on their profile page.
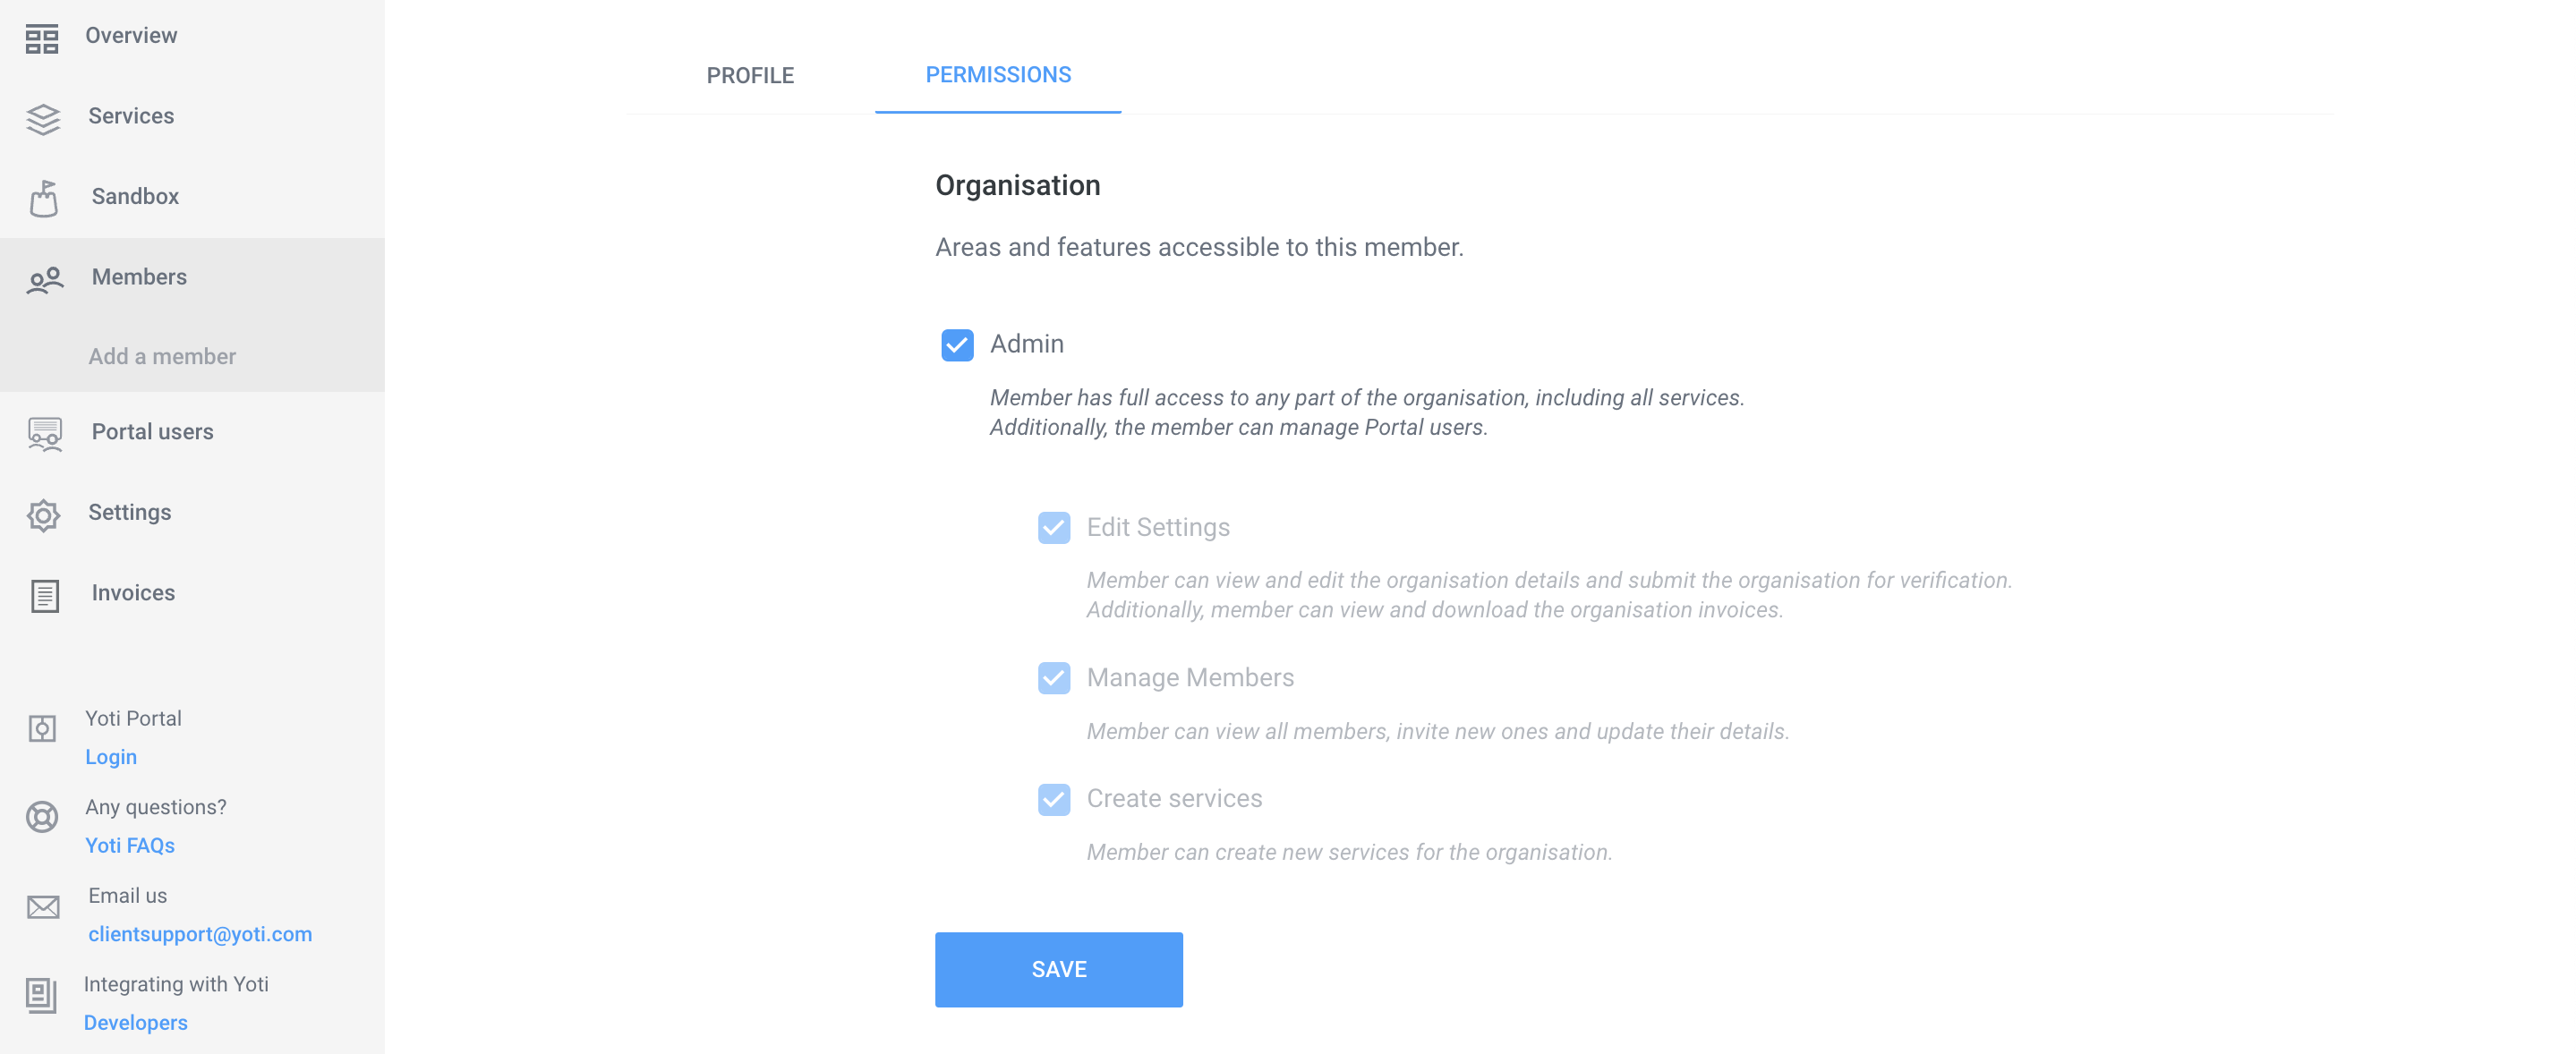
Permission | Description |
|---|---|
No permissions | Users can view the overview page, the list of the organisation's services and the list of members. |
Create Applications and Pages | Users can create services within the organisation. They will become an admin of those services. |
Edit Settings | Users can view the organisation's settings, manage payment cards and add missing organisation details. |
Manage Members | Users can view and edit member information, invite new users and remove pending users. |
Admin | Admins inherit all of the permissions above. They can also set and update permissions for users, delete active users and will gain admin access to every service within the organisation. |
Service Permissions
Once a user is part of an organisation, they can be invited as collaborators for individual services. An organisation can set collaborator permissions for a user in their profile page, or they can be set in the Collaborator tab within the service.
Once a user is added as a collaborator of an service they automatically get collaborator permissions.
Permission | Description |
|---|---|
No permissions | All members of an organisation can see all services in the overview page. |
Collaborator | Users can view the Scenarios and Keys tabs. |
Access Receipts | Users can view, filter and download receipts. |
Edit | Users can edit services details, create, update and delete scenarios, generate keys and update the states of services. |
Admin | Admins inherit all of the permissions above. They can also add collaborators, set permissions for them and delete services and receipts. |
Delete a user
If you have a leaver the administrator of the account will need to do the following:
Log into the hub
Navigate to their organisation
Click on Members
Click on the user they want to remove
Click REMOVE MEMBER
This will prevent the user from logging in the hub from their Digital ID app. Yoti does not administer Hub accounts for you, it's all under your control and responsibility.
Deleting your service
To delete your service go Service > Arrow icon > press Delete.
There is also an option to deactivate your service which will hold your integration as a paused state. Users will not be able use your integration until it gets activated again.
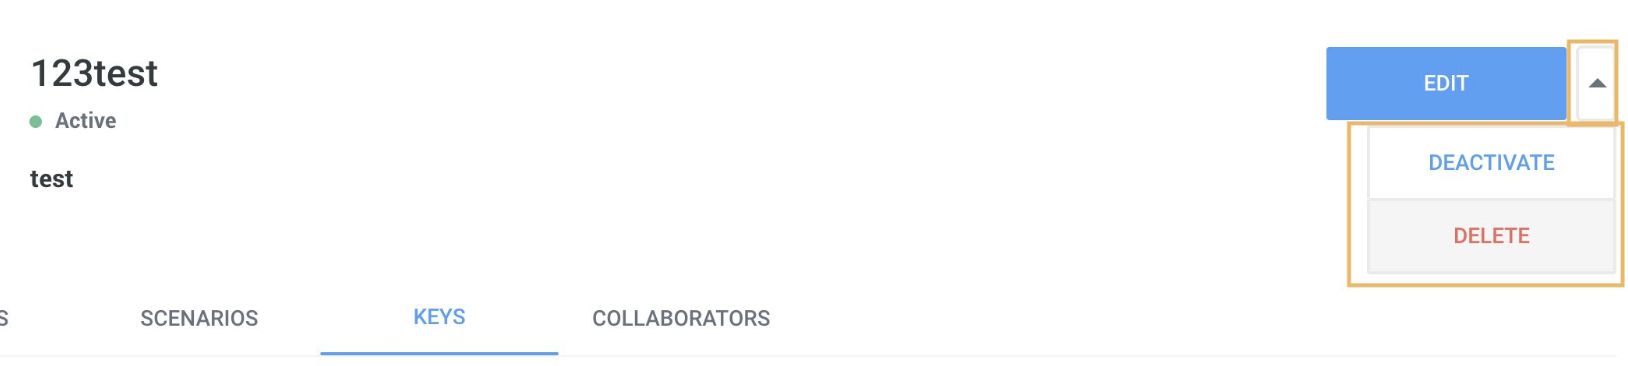
Hint If you delete your service, we cannot recover this for you.