Yoti provides you with a simple dashboard management tool called Yoti Hub to get you up and running with our products. The Yoti hub allows you to generate your API keys, add your billing information and more.
Once your organisation has been created, our onboarding team will aim to review your application within 2-3 business hours. We will send you an onboarding email once your account is verified.
To start integrating our products, you will need to:
- Set up an account on the Hub and get verified.
- Create a service
- Activate application
This section walks you through how to complete this. You will need to know information about your organisation, key contact details and billing details.
If you don't have this to hand, don't worry, you can return anytime to continue with your application.
Create your business account
Get access to Yoti Hub here
You will be directed to a screen, where you can register an organisation or log in to an existing one:
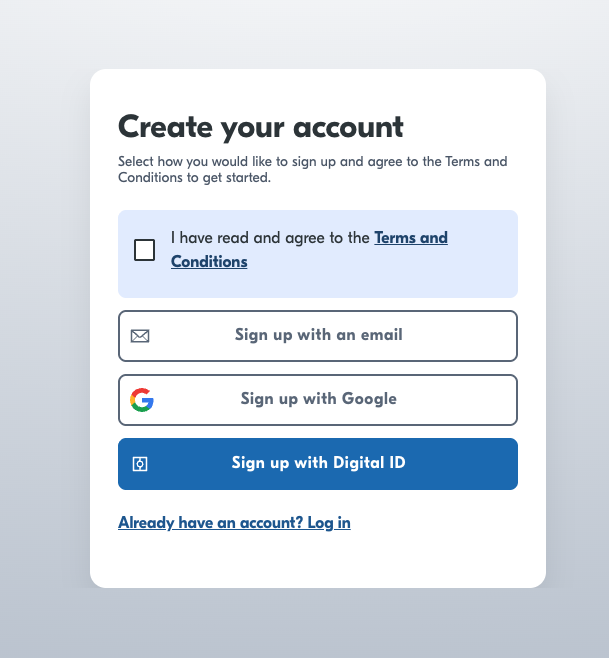
Registering a new organisation will first require you to create an account on the Yoti Hub. You can use the Yoti digital ID app to create an account; sign up using Google or use an email, password and a multi-factor authentication app.
Onboarding page
Once your Hub account is created, there is a short form to fill out. We aim to verify your account within 2-4 hours. If we have any questions about your application, we will email you. You will receive an email if all is approved.
Congratulations, your account is set up and you should see the screen below! At this point, you will also receive an email from Yoti welcoming you on board.

As the applicant, you will instantly gain full access to your organisation's Yoti Hub account. You can go ahead and create a service from this point.
We appreciate that your organisation details may not remain the same as when you first registered. If you need to change any information, please contact us at organisations@yoti.com so we can update it. This ensures that we can verify any changes and keep information aligned.
Create a Digital ID service
Here you will create your QR code page.
Create a Digital ID application and scenario in the hub. Instructions can be found in the onboarding section.
You will select:
- The Attributes that you wish to retrieve from the user.
- Customisation ability to change the logo and background of the QR code page.
Please set the domain to: www.yoti.com
Please set the callback URL to: www.yoti.com/connect/thankyou
Lastly, to retrieve the URL of your page:
- Head over to your scenario (Click applications, your application, and you will see the scenario tab).
- Click the small arrow in the scenario and press Edit.
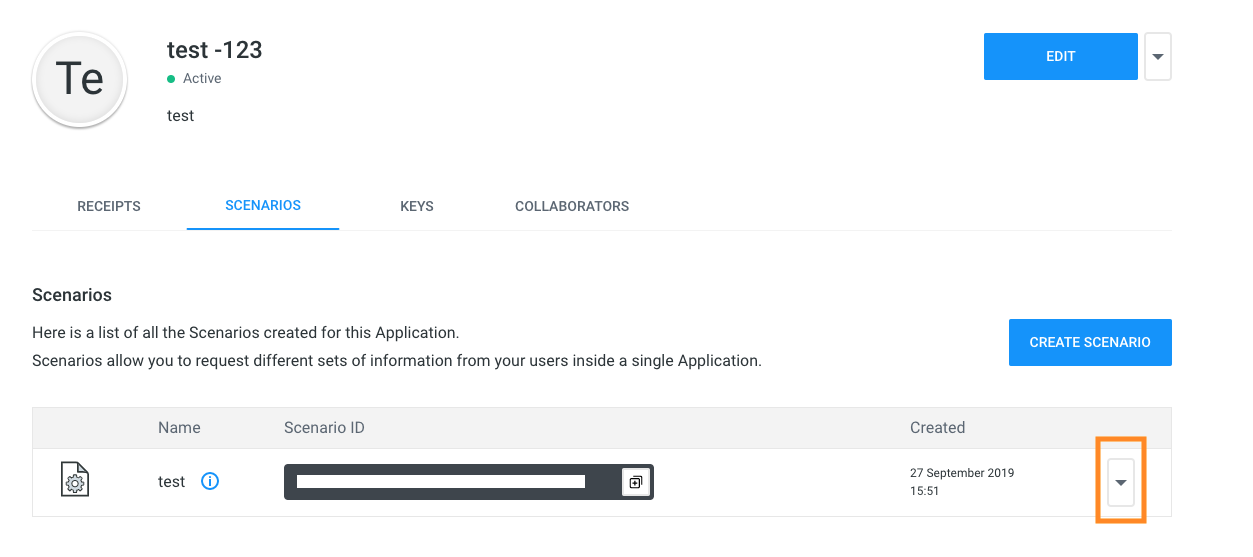
Edit your scenario
- The URL will be at the top of this page. Copy this URL, as it will be the page that users will land on to scan the QR code.
Please see this page as an example and below
Results
Whenever details are shared through Yoti, each party involved immediately receives a record of the activity: who they shared with, what was shared, and the date and time the information was shared.
You will see the receipts of your applications in the receipts tab ordered by date. You will need to have your phone connected to Yoti Hub in order to view receipts.
No one at Yoti can ever see your receipts - they are encrypted and we have no access to the key needed to decrypt the receipts. Only you do.
Download receipts
To download the receipts, there is an Export to CSV button - this will download all of the receipts in the selected time period. By default, we display receipts from the last month.
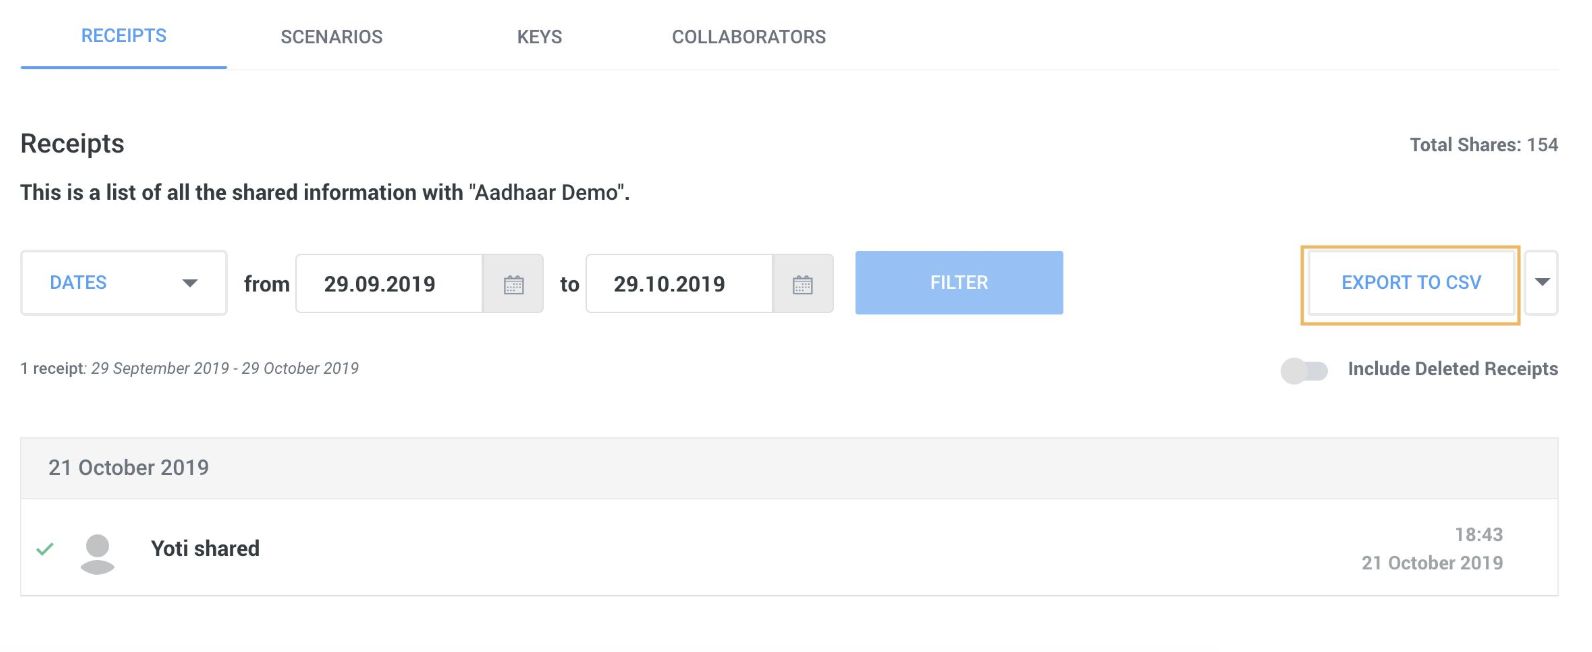
Applications > Receipts
Filter receipts
To filter receipts, you can use our date filter. This will display the receipts from this time period.
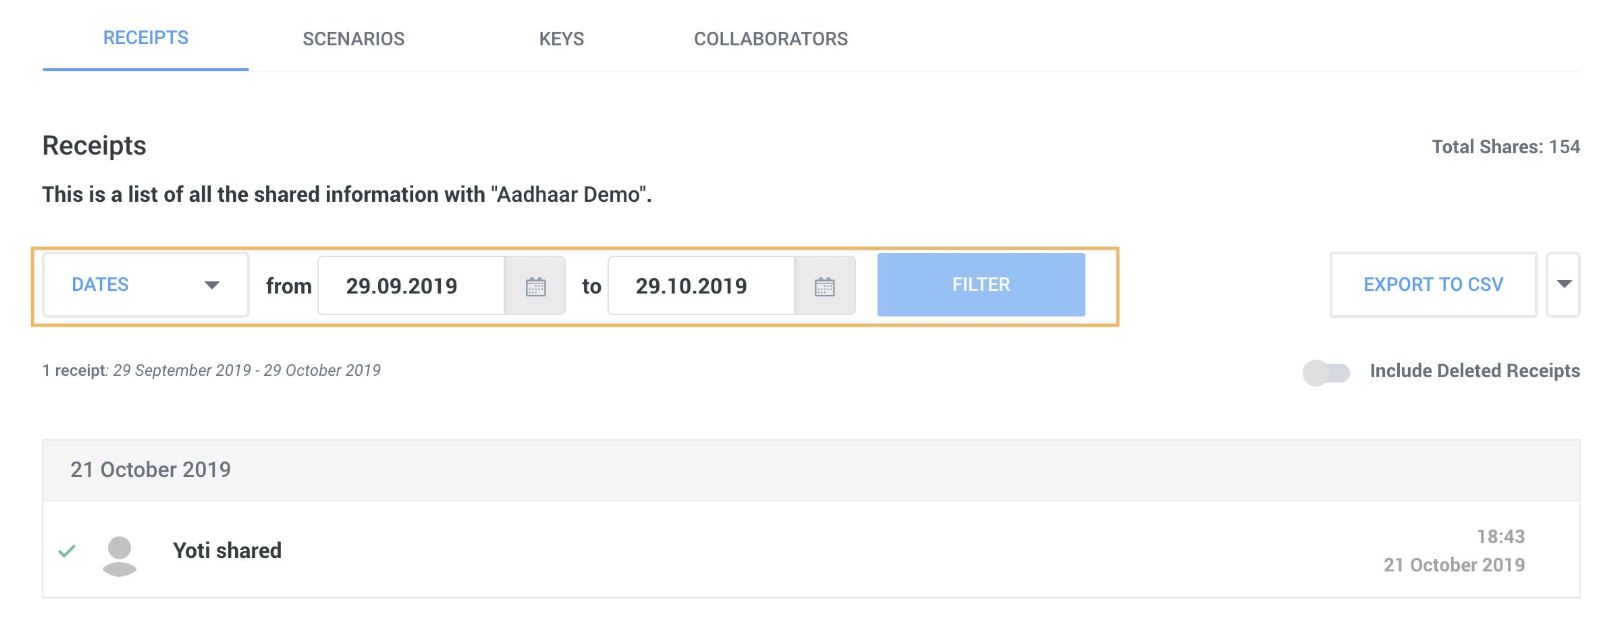
Applications > Receipts
Delete receipts
You can delete receipts for a certain time period or for a certain user.
To delete receipts by time period, filter the list based on the date range that you want to remove and click the Delete button in the dropdown menu next to Export to CSV.
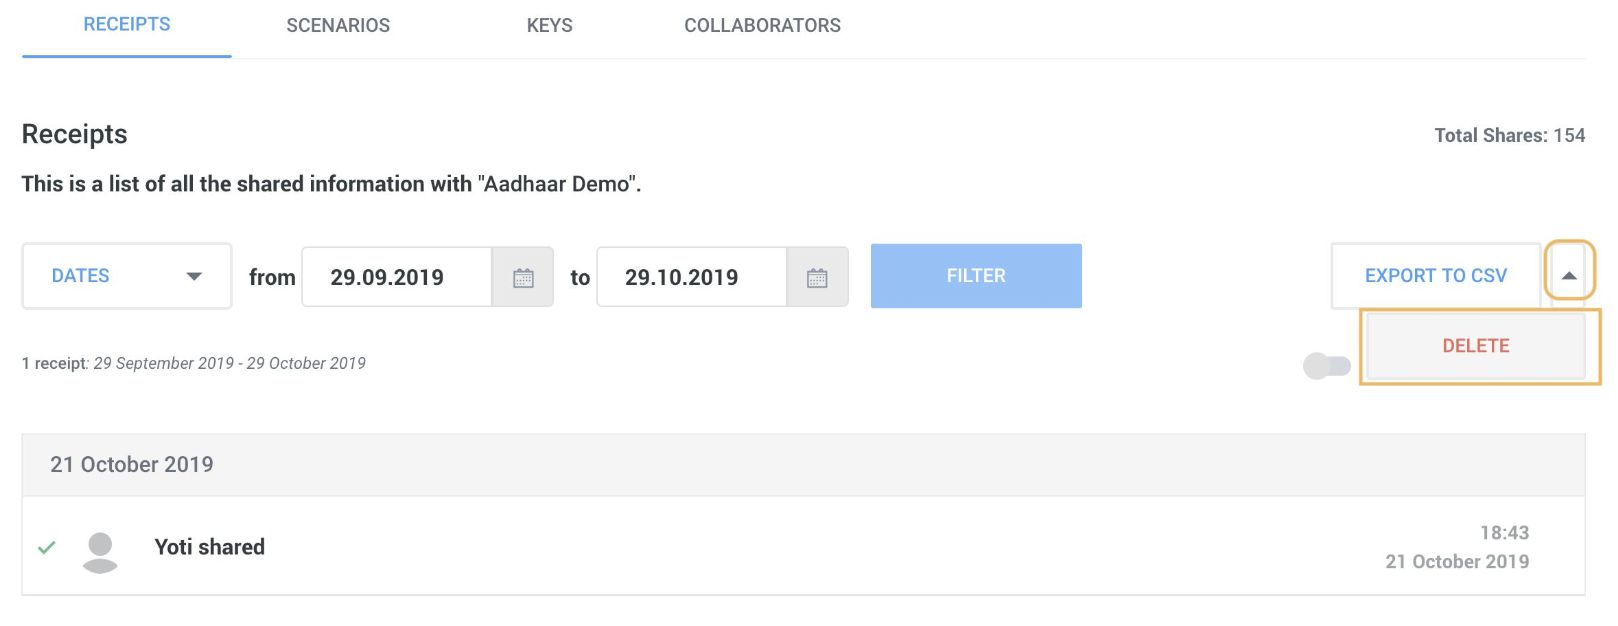
Applications > Receipts
View source / verifier
To view further information about how Yoti has verified the user's details, you can click on the Show sources and verifiers tick box at the top of an individual receipt.
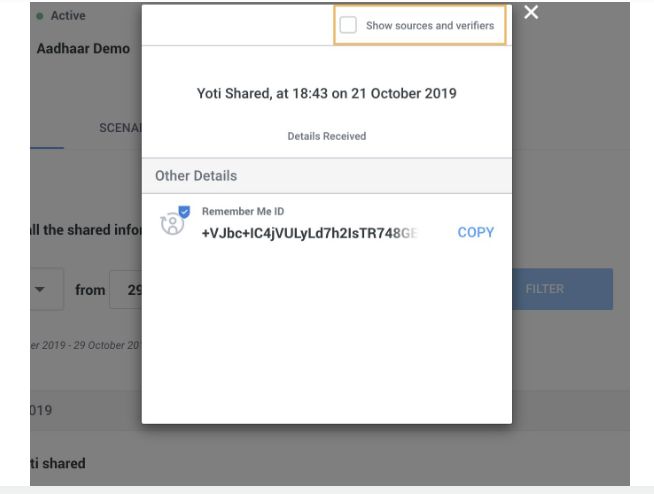
Applications > Receipts > Click Receipts > Show sources and verifiers