Once you've set up your organisation account on the Yoti Hub, you’re ready to start integrating with Yoti. This section explains how to complete a basic web integration.
Before you start
Please have a look at our best practices for a better performance of the SDK.
Good to know...
Following our user experience guidelines makes for a faster and more enjoyable experience for your users. Please read these sections before you continue.
QR Code type
You will need to create a button to allow your users to authenticate with Yoti. See Button design guide before you start the integration.
This contains a QR code for users to scan with their Yoti app. Mobile web users will skip the QR code scanning step, as they use the Yoti mobile app directly to authenticate. For more information on our modal go to our Integration guide.
Yoti has three options to display the QR code.
Modal
Instant
Inline
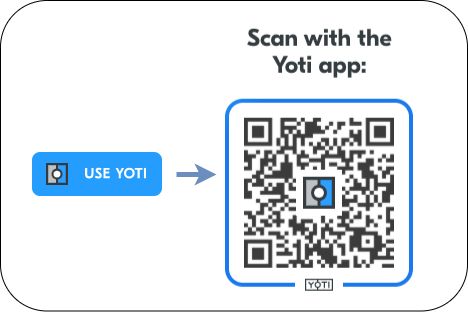
The modal QR code option has a button which when clicked opens a modal pop out window with the QR code present. There are three tabs, describing how to scan the QR code, The QR code and attributes to be shared and about Yoti - Please give it a click to see it working:
Inline
The inline QR code option has a button which when clicked opens just the QR code. You will need to provide more context as to what Yoti is for this. See scenario example section for more detail.
Instant
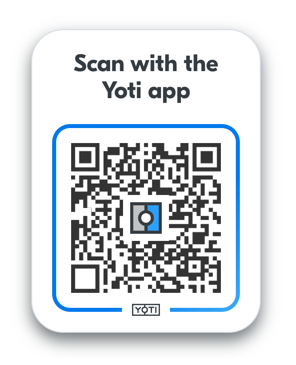
The instant QR code option is just the QR code with no button. You will need to provide more context as to what Yoti is for this. See scenario example section for more detail. Example below:
Generate a Yoti button
Yoti provides a button generator for you to include in your HTML file. In the example below, the button generator script has been added to the head of the HTML document.
To generate the Yoti button use the code snippet below:
Modal
<!-- Simple Button Generation -->
<head>
<script src="https://www.yoti.com/share/client/"></script>
</head>
<body>
<!-- Yoti element will be rendered inside this DOM node -->
<div id="xxx"></div>
<!-- This script snippet will also be required in your HTML body -->
<script>
window.Yoti.Share.init({
elements: [
{
domId: "xxx",
scenarioId: "xxxxxx-xxxx-xxxx-xxxx-xxxxxxxxxxxx",
clientSdkId: "xxxxxx-xxxx-xxxx-xxxx-xxxxxxxxxxxx"
}
]
});
</script>
</body>
<!-- Advanced Button Generation -->
<head>
<script src="https://www.yoti.com/share/client/"></script>
</head>
<body>
<!-- Yoti element will be rendered inside this DOM node -->
<div id="xxx"></div>
<!-- This script snippet will also be required in your HTML body -->
<script>
window.Yoti.Share.init({
elements: [
{
domId: "xxx",
scenarioId: "xxxxxx-xxxx-xxxx-xxxx-xxxxxxxxxxxx",
clientSdkId: "xxxxxx-xxxx-xxxx-xxxx-xxxxxxxxxxxx",
button: {
label: "Use Yoti",
align: "center", // "left" | "right"
width: "full" // "auto"
},
modal: {
zIndex: 9999 // default to 9999, min of 0 - max of 2147483647
},
// shareComplete is currently not supported on Mobile
shareComplete: {
closeDelay: 4000, // default to 4000, min of 500 - max of 10000
tokenHandler: (token, done) => {
console.log(`Received the token: ${token}`);
done(); //done() will overwrite the closeDelay
}
}
}
]
});
</script>
</body>
// Example React Component
const YotiButton = props => {
const buttonRef=useRef(null)
useEffect(() =>{
const yoti=window.Yoti.Share.init({
'elements': [{
'clientSdkId': props.clientSdkId,
'scenarioId': props.scenarioId,
'domId': buttonRef.current.id,
'button': {
'label': props.text
}
}]
})
return yoti.destroy
}, [props.clientSdkId])
return(
<div
style={{ height: props.height, width: props.width}}
ref={buttonRef}
id="button-ref"
/>
)
}
// Example Angular Component
// Include the yoti client script in the head of your index.html file
// <script src="https://www.yoti.com/share/client/"></script>
// You can directly refer to the window object, but it is a good practice to create wrapper service that gets the native window object.
// Create target <div> with an id, in you template and initialize the Yoti Init() method within your Angular component in the below format
import { Component, OnInit, OnDestroy} from '@angular/core';
import { WindowRefService } from '../window-ref.service';
@Component({
selector: 'app-yoti-button',
templateUrl: './yoti-button.component.html',
})
export class YotiButtonComponent implements OnInit, OnDestroy {
private WinObj : any;
private YotiButton : any;
constructor(private winRef:WindowRefService) {
this.WinObj = winRef.nativeWindow;
}
ngOnInit(): void {
this.YotiButton = this.WinObj.Yoti.Share.init({
elements: [
{
domId: "yotibutton",
scenarioId: "xxxxxxxx-xxxx-xxxx-xxxx-xxxxxxxxxxxx",
clientSdkId: "xxxxxxxx-xxxx-xxxx-xxxx-xxxxxxxxxxxx",
button: {
label: "Use Yoti",
align: "center", // "left" | "right"
width: "auto" // "full"
},
modal: {
zIndex: 9999 // default to 9999, min of 0 - max of 2147483647
},
}
]
});
}
}
// To destroy the Yoti-Button object, before re-initializing it, eg: on Router Path Changes.
ngOnDestroy(): void { this.YotiButton.destroy(); }
Inline
<!-- Simple Button Generation -->
<head>
<script src="https://www.yoti.com/share/client/"></script>
</head>
<body>
<!-- Yoti element will be rendered inside this DOM node -->
<div id="xxx"></div>
<!-- This script snippet will also be required in your HTML body -->
<script>
window.Yoti.Share.init({
elements: [
{
domId: "xxx",
scenarioId: "xxxxxx-xxxx-xxxx-xxxx-xxxxxxxxxxxx",
clientSdkId: "xxxxxx-xxxx-xxxx-xxxx-xxxxxxxxxxxx",
type: "inline",
button: {
label: " Use Yoti",
title: " Scan with the Yoti app"
}
}
]
});
</script>
</body>
Instant
<!-- Simple Button Generation -->
<head>
<script src="https://www.yoti.com/share/client/"></script>
</head>
<body>
<!-- Yoti element will be rendered inside this DOM node -->
<div id="xxx"></div>
<!-- This script snippet will also be required in your HTML body -->
<script>
window.Yoti.Share.init({
elements: [
{
domId: "xxx",
scenarioId: "xxxxxx-xxxx-xxxx-xxxx-xxxxxxxxxxxx",
clientSdkId: "xxxxxx-xxxx-xxxx-xxxx-xxxxxxxxxxxx",
type: "inline",
qr: {
title: " Scan with the Yoti app"
}
}
]
});
</script>
</body>
This JavaScript library currently needs to be invoked – do this by calling Yoti.Share.init() in the body of your HTML document. For the config, you will need to specify a ‘domId’ so we know where we need to add the Yoti button on your page and the ‘scenarioId’ that is being provided by Yoti Hub after creating an application.
The Yoti button requires the hosting page to be accessed via HTTPS, so please make sure that your web application has HTTPS enabled.
Finally, the domain port pair where the button is deployed (i.e. https://localhost:8000) must match the one that you have configured in Yoti Hub. This prevents other web sites from embedding your Yoti button.
Name | Purpose | Required |
|---|
domID | Specifies the ID of the DOM node where Yoti webshare wants to be rendered. | Yes |
clientSdkId | Identifies your Yoti Hub application. This value can be found in the Hub, within your application section, in the keys tab. | Yes |
scenarioId | Identifies the attributes associated with your Yoti application. This value can be found on your application page in Yoti Hub (navigate to Scenarios tab) | Yes |
Button | Config for the button styling. | No |
Button - Label | Text on the button. Should be relevant for your use case. | No |
Button - align | Alignment of the button in the parent div - "center", "left", "right" | No |
Button - width | Width of the button - "auto" will set to fit the label. "full" - will fill the width of the parent div. | No |
Modal - zIndex | Sets the z-index of the modal. This is defaulted to 9999. | No |
shareComplete | Allows token handling to be performed without redirecting the webpage. | No |
shareComplete - closeDelay | How long the modal will stay open before handling the token or redirecting. Default to 4000ms with a min of 500ms and a max of 1000ms | No |
shareComplete - tokenHandler | Allows you to run your own function to handle the token without a redirect. Calling done() will close the modal; overwriting any closeDelay you have. | No |
label | This is the text on the button and is customisable | Yes |
title | This is the text around the QR code and is customisable | No |
Knowledge base
The redirected callback page will contain any existing query parameters at the time of the Yoti Share.
Before you continue
Please have a look at our best practices. We recommend taking them into account for a better performance of the SDK.
Install SDK
Once you have a working button, you can move on to installing the SDK. To successfully integrate you will need the following information about your application from Yoti Hub:
SDK ID
This is generated by Yoti when you publish your Yoti application in Yoti Hub. You can find it labelled as Yoti Client SDK ID under the Keys tab within your application. The SDK ID is necessary to initialise the Yoti SDK and it is passed in each call to our system.
Your application key pair
This is the private key (in .pem format) associated with the Yoti application you created in Yoti Hub.
There are three purposes for this PEM file:
Decrypting the one-time-use token.
Signing your requests to our system.
Decrypting the fetched user profile so that the profile data can be consumed by your application.
If you lose or corrupt your PEM file you will be able to generate a new one. Regenerating your key pair will break your current application by invalidating your current PEM file and generated keys. This means you will be unable to decrypt new tokens until these are replaced by the newly-generated ones.
The Yoti SDKs are available via popular dependency management systems. Further details can be found on the pages of the specific projects.
To install the Yoti SDK using NPM:
gem install yoti
# The gem provides a configuration generator for Ruby on Rails:
rails generate yoti:install
// Get the Yoti PHP SDK library via a Composer package
composer require yoti/yoti-php-sdk
// If you are using Maven, add the following dependency:
<dependency>
<groupId>com.yoti</groupId>
<artifactId>yoti-sdk-impl</artifactId>
<version>2.6.0</version>
</dependency>
// If you are using Gradle, add the following dependency:
compile group: 'com.yoti', name: 'yoti-sdk-impl', version: ‘2.6.0'
// As of version 2.4.0, modules are used. This means it's not necessary to get a copy or fetch all dependencies
// as instructed below, as the Go toolchain will fetch them as necessary.
// You can simply add a `require github.com/getyoti/yoti-go-sdk/v2` to go.mod.
// To download and install the Yoti SDK and its dependencies, run the following command from your terminal:
go get "github.com/getyoti/yoti-go-sdk/v2”
// To install the Yoti NuGet package you will need to install NuGet.
// To import the latest Yoti SDK into your project, enter the following
// command from NuGet Package Manager Console in Visual Studio:
Install-Package Yoti
// For other installation methods, see https://www.nuget.org/packages/Yoti
Once you have added the Yoti SDK dependency to your project, it’s time to initialise a Yoti client as shown in the code snippet below.
const yoti = require('yoti')
const CLIENT_SDK_ID = 'YOTI_CLIENT_SDK_ID'
const PEM_PATH = 'YOTI_KEY_FILE_PATH'
const PEM_KEY = fs.readFileSync(PEM_PATH)
// For SDK version < 3
const yotiClient = new yoti(CLIENT_SDK_ID, PEM)
// For SDK version >= 3
const yotiClient = new yoti.Client(CLIENT_SDK_ID, PEM_KEY)
Yoti.configuration do |c|
c.yoti_client_sdk_id = ENV['YOTI_CLIENT_SDK_ID']
c.yoti_key_file_path = ENV['YOTI_KEY_FILE_PATH']
end
# or
Yoti.configuration do |c|
c.yoti_client_sdk_id = ENV['YOTI_CLIENT_SDK_ID']
c.yoti_key = ENV['YOTI_KEY']
end
# Where *YOTI_KEY* is an environment variable that stores the content of the secret key:
# YOTI_KEY="-----BEGIN RSA PRIVATE KEY-----\nMIIEp…"
<?php
require_once './vendor/autoload.php';
$client = new \Yoti\YotiClient('YOTI_CLIENT_SDK_ID', 'YOTI_KEY_FILE_PATH');
from yoti_python_sdk import Client
client = Client(YOTI_CLIENT_SDK_ID, YOTI_KEY_FILE_PATH)
import java.io.File;
import com.yoti.api.client.ActivityDetails;
import com.yoti.api.client.Date;
import com.yoti.api.client.FileKeyPairSource;
import com.yoti.api.client.HumanProfile;
import com.yoti.api.client.HumanProfile.Gender;
import com.yoti.api.client.Image;
import com.yoti.api.client.YotiClient;
import com.yoti.api.client.YotiClientBuilder;
YotiClient client = YotiClientBuilder.newInstance()
.forApplication(<YOTI_CLIENT_SDK_ID>)
.withKeyPair(FileKeyPairSource.fromFile(new File("<YOTI_KEY_FILE_PATH>")))
.build();
sdkID := "YOTI_CLIENT_SDK_ID";
key, _ := ioutil.ReadFile("YOTI_KEY_FILE_PATH")
client := yoti.Client{
SdkID: sdkID,
Key: key}
const string SDK_ID = "YOTI_CLIENT_SDK_ID";
const string PEM_PATH = "YOTI_KEY_FILE_PATH";
var privateKeyStream = System.IO.File.OpenText(PEM_PATH);
var yotiClient = new YotiClient(SDK_ID, privateKeyStream);
API Link
Jump straight to our API references with code snippets if you prefer.
Retrieve a profile
Retrieving a profile involves receiving a one-time-use token, and decrypting it to get a user profile.
When a user scans a Yoti QR code, Yoti makes a GET request to your callback URL, passing a token as a query string parameter.
For a URL set as https://your-callback-url in Yoti Hub, the returned callback URL would look like the following: https://your-callback-url?token=
You can set and edit the callback URL within your Yoti application under the Integration tab. Yoti will automatically prefix the URL with your domain.
When your web application receives a token via the exposed endpoint as a query string parameter, you can easily retrieve the user profile. The user profile object provides a set of attributes corresponding to the user attributes you specified during the creation of your Yoti application on Hub.
SDK process
When you pass the token to the Yoti Client object, the SDK does the following:
Decrypts the wrapped receipt key attribute, using the application private key.
Uses the decrypted key to decrypt the other party profile content attribute.
Decodes the decrypted profile and returns it to your application.
The profile attributes are central to the SDK and allow you to see and work with the information that your users share with you.
yotiClient.getActivityDetails(oneTimeUseToken)
.then((activityDetails) => {
const rememberMeId = activityDetails.getRememberMeId();
const parentRememberMeId = activityDetails.getParentRememberMeId();
const receiptId = activityDetails.getReceiptId();
const timestamp = activityDetails.getTimestamp();
const base64SelfieUri = activityDetails.getBase64SelfieUri();
const userProfile = activityDetails.getUserProfile(); // deprecated, use getProfile() instead
const profile = activityDetails.getProfile();
const applicationProfile = activityDetails.getApplicationProfile();
const selfieImageData = profile.getSelfie().getValue();
const fullName = profile.getFullName().getValue();
const familyName = profile.getFamilyName().getValue();
const givenNames = profile.getGivenNames().getValue();
const phoneNumber = profile.getPhoneNumber().getValue();
const emailAddress = profile.getEmailAddress().getValue();
const dateOfBirth = profile.getDateOfBirth().getValue();
const postalAddress = profile.getPostalAddress().getValue();
const structuredPostalAddress = profile.getStructuredPostalAddress().getValue();
const gender = profile.getGender().getValue();
const nationality = profile.getNationality().getValue();
const ageVerified = profile.getAgeVerified().getValue();
const documentDetails = profile.getDocumentDetails().getValue();
const applicationName = applicationProfile.getName().getValue();
const applicationUrl = applicationProfile.getUrl().getValue();
const applicationLogo = applicationProfile.getLogo().getValue();
const applicationReceiptBgColor = applicationProfile.getReceiptBgColor().getValue();
// You can retrieve the sources and verifiers for each attribute as follows
const givenNamesObj = profile.getGivenNames()
const givenNamesSources = givenNamesObj.getSources(); // list/array of anchors
const givenNamesVerifiers = givenNamesObj.getVerifiers(); // list/array of anchor
// You can also retrieve further properties from these respective anchors in the following way:
// Retrieving properties of the first anchor
const value = givenNamesSources[0].getValue(); // string
const subtype = givenNamesSources[0].getSubType(); // string
const timestamp = givenNamesSources[0].getSignedTimeStamp().getTimestamp(); // Date object
const originServerCerts = givenNamesSources[0].getOriginServerCerts(); // list of X509 certificates
})
yoti_activity_details = Yoti::Client.get_activity_details(oneTimeUseToken)
remember_me_id = yoti_activity_details.remember_me_id
parent_remember_me_id = yoti_activity_details.parent_remember_me_id
receipt_id = yoti_activity_details.receipt_id
timestamp = yoti_activity_details.timestamp
base64_selfie_uri = yoti_activity_details.base64_selfie_uri
age_verified = yoti_activity_details.age_verified
profile = yoti_activity_details.profile
application_profile = yoti_activity_details.application_profile
selfie_image_data = profile.selfie.value
full_name = profile.full_name.value
given_names = profile.given_names.value
family_name = profile.family_name.value
phone_number = profile.phone_number.value
email_address = profile.email_address.value
date_of_birth = profile.date_of_birth.value
postal_address = profile.postal_address.value
structured_postal_address = profile.structured_postal_address.value
gender = profile.gender.value
nationality = profile.nationality.value
application_name = application_profile.name.value
application_url = application_profile.url.value
application_logo = application_profile.logo.value
application_receipt_bgcolor = application_profile.receipt_bgcolor.value
# You can retrieve the sources and verifiers for each attribute as follows:
given_names_obj = profile.given_names
given_names_sources = given_names_obj.sources # list of anchors
given_names_verifiers = given_names_obj.verifiers # list of anchors
given_names_anchors = given_names_attribute.anchors
# You can also retrieve further properties from these respective anchors in the following way:
# Retrieving properties of the first anchor
type = given_names_sources[0].type # string
value = given_names_sources[0].value # string
sub_type = given_names_sources[0].sub_type # string
time_stamp = given_names_sources[0].signed_time_stamp.time_stamp # DateTime object
origin_server_certs = given_names_sources[0].origin_server_certs # list of X509 certificates
<?php
$activityDetails = $client->getActivityDetails($oneTimeUseToken);
rememberMeId = $activityDetails->getRememberMeId();
parentRememberMeId = $activityDetails->getParentRememberMeId();
$profile = $activityDetails->getProfile();
$applicationProfile = $activityDetails->getApplicationProfile();
$selfieImageObj = $profile->getSelfie()->getValue();
$selfieImageBase64Content = $selfieImageObj->getBase64Content();
$fullName = $profile->getFullName()->getValue();
$givenNames = $profile->getGivenNames()->getValue();
$familyName = $profile->getFamilyName()->getValue();
$phoneNumber = $profile->getPhoneNumber()->getValue();
$emailAddress = $profile->getEmailAddress()->getValue();
$dateOfBirth = $profile->getDateOfBirth()->getValue();
$postalAddress = $profile->getPostalAddress()->getValue();
$structuredPostalAddress = $profile->getStructuredPostalAddress()->getValue();
$gender = $profile->getGender()->getValue();
$nationality = $profile->getNationality()->getValue();
$ageVerifications = $profile->getAgeVerifications();
$ageUnderVerification = $profile->findAgeUnderVerification($age);
$ageOverVerification = $profile->findAgeOverVerification($age);
$documentDetails = $profile->getDocumentDetails()->getValue();
$applicationName = $applicationProfile->getApplicationName()->getValue();
$applicationUrl = $applicationProfile->getApplicationUrl()->getValue();
$applicationLogo = $applicationProfile->getApplicationLogo()->getValue();
$applicationReceiptBgColor = $applicationProfile->getApplicationReceiptBgColor()->getValue();
// You can retrieve the sources and verifiers for each attribute as follows:
$givenNamesObj = $profile->getGivenNames();
$givenNamesSources = $givenNamesObj->getSources(); // list of anchors
$givenNamesVerifiers = $givenNamesObj->getVerifiers(); // list of anchors
// You can also retrieve further properties from these respective anchors in the following way:
// Retrieving properties of the first anchor
$value = $givenNamesSources[0]->getValue(); // string
$subType = $givenNamesSources[0]->getSubType(); // string
$timeStamp = $givenNamesSources[0]->getSignedTimeStamp()->getTimestamp(); // DateTime object
$originServerCerts = $givenNamesSources[0]->getOriginServerCerts(); // list of X509 certificates
activity_details = client.get_activity_details(oneTimeUseToken)
profile = activity_details.profile
selfie = profile.selfie.value
given_names = profile.given_names.value
family_name = profile.family_name.value
full_name = profile.full_name.value
phone_number = profile.phone_number.value
date_of_birth = profile.date_of_birth.value
postal_address = profile.postal_address.value
structured_postal_address = profile.structured_postal_address.value
gender = profile.gender.value
nationality = profile.nationality.value
remember_me_id = activity_details.user_id
base64_selfie_uri = activity_details.base64_selfie_uri
# You can retrieve the anchors, sources and verifiers for each attribute as follows:
given_names_attribute = profile.given_names
given_names_anchors = given_names_attribute.anchors
given_names_sources = given_names_attribute.sources
given_names_verifiers = given_names_attribute.verifiers
# You can also retrieve further properties from these respective anchors in the following way:
source_anchor = given_names_sources[0]
value = source_anchor.value
sub_type = source_anchor.sub_type
timestamp = source_anchor.signed_timestamp
origin_server_certs = source_anchor.origin_server_certs
ActivityDetails activityDetails = client.getActivityDetails(oneTimeUseToken);
HumanProfile profile = activityDetails.getUserProfile();
ApplicationProfile applicationProfile = activityDetails.getApplicationProfile();
String rememberMeId = activityDetails.getRememberMeId();
String parentRememberMeId = activityDetails.getParentRememberMeId();
Date timestamp = activityDetails.getTimestamp();
String receiptId = activityDetails.getReceiptId();
Image selfie = profile.getSelfie().getValue();
String selfieBase64Content = selfie.getBase64Content();
String fullName = profile.getFullName().getValue();
String givenNames = profile.getGivenNames().getValue();
String familyName = profile.getFamilyName().getValue();
String phoneNumber = profile.getPhoneNumber().getValue();
String emailAddress = profile.getEmailAddress().getValue();
Date dateOfBirth = profile.getDateOfBirth().getValue();
String gender = profile.getGender().getValue();
String address = profile.getPostalAddress().getValue();
String nationality = profile.getNationality().getValue();
AgeVerification over18Verification = profile.findAgeOverVerification(18);
if (over18Verification != null) {
boolean isAgedOver18 = over18Verification.getResult();
}
AgeVerification under55Verification = profile.findAgeUnderVerification(55);
if (under55Verification != null) {
boolean isAgedUnder55 = under55Verification.getResult();
}
Map<?, ?> structuredPostalAddress = profile.getStructuredPostalAddress().getValue();
DocumentDetails documentDetails = profile.getDocumentDetails().getValue();
String applicationName = applicationProfile.getApplicationName().getValue();
String applicationUrl = applicationProfile.getApplicationUrl().getValue();
Image applicationLogo = applicationProfile.getApplicationLogo().getValue();
String applicationReceiptBgColor = applicationProfile.getApplicationReceiptBgColor().getValue();
// You can retrieve the sources and verifiers for each attribute as follows:
Attribute<String> givenNamesAttr = profile.getGivenNames();
List<Anchor> givenNamesSources = givenNamesAttr.getSources();
List<Anchor> givenNamesVerifiers = givenNamesAttr.getVerifiers();
List<Anchor> givenNamesAnchors = givenNamesAttr.getAnchors();
// You can also retrieve further properties from these respective anchors in the following way:
// Retrieving properties of the first anchor
Anchor firstSourceAnchor = givenNamesSources.get(0);
String type = firstSourceAnchor.getType();
String value = firstSourceAnchor.getValue();
String subType = firstSourceAnchor.getSubType();
SignedTimestamp signedTimestamp = firstSourceAnchor.getSignedTimestamp();
List<X509Certificate> originCertificates = firstSourceAnchor.getOriginCertificates(); // list of X509 certificates
activityDetails, errStrings := client.GetUserProfile(oneTimeUseToken)
var rememberMeID string = activityDetails.RememberMeID()
var parentRememberMeID string = activityDetails.ParentRememberMeID()
var userProfile yoti.Profile = activityDetails.UserProfile
var selfie = userProfile.Selfie().Value()
var givenNames string = userProfile.GivenNames().Value()
var familyName string = userProfile.FamilyName().Value()
var fullName string = userProfile.FullName().Value()
var mobileNumber string = userProfile.MobileNumber().Value()
var emailAddress string = userProfile.EmailAddress().Value()
var address string = userProfile.Address().Value()
var gender string = userProfile.Gender().Value()
var nationality string = userProfile.Nationality().Value()
var dateOfBirth *time.Time
dobAttr, err := userProfile.DateOfBirth()
if err != nil {
// handle error
} else {
dateOfBirth = dobAttr.Value()
}
var structuredPostalAddress map[string]interface{}
structuredPostalAddressAttribute, err := userProfile.StructuredPostalAddress()
if err != nil {
// handle error
} else {
structuredPostalAddress := structuredPostalAddressAttribute.Value().(map[string]interface{})
}
// If you have chosen Verify Condition on the Yoti Dashboard with the age condition of "Over 18",
// you can retrieve the user information with the generic .GetAttribute method, which requires the
// result to be cast to the original type:
userProfile.GetAttribute("age_over:18").Value().(string)
// GetAttribute returns an interface, the value can be acquired through a type assertion.
// From each attribute you can retrieve the Anchors, and subsets Sources and Verifiers
// (all as []*anchor.Anchor) as follows:
givenNamesAnchors := userProfile.GivenNames().Anchors()
givenNamesSources := userProfile.GivenNames().Sources()
givenNamesVerifiers := userProfile.GivenNames().Verifiers()
// You can also retrieve further properties from these respective anchors in the following way:
var givenNamesFirstAnchor *anchor.Anchor = givenNamesAnchors[0]
var anchorType anchor.Type = givenNamesFirstAnchor.Type()
var signedTimestamp *time.Time = givenNamesFirstAnchor.SignedTimestamp().Timestamp()
var subType string = givenNamesFirstAnchor.SubType()
var value []string = givenNamesFirstAnchor.Value()
ActivityDetails activityDetails = yotiClient.GetActivityDetails(oneTimeUseToken);
YotiProfile profile = activityDetails.Profile;
Image selfie = profile.Selfie?.GetValue();
string selfieURI = profile.Selfie?.GetValue().GetBase64URI();
string fullName = profile.FullName?.GetValue();
string givenNames = profile.GivenNames?.GetValue();
string familyName = profile.FamilyName?.GetValue();
string mobileNumber = profile.MobileNumber?.GetValue();
string emailAddress = profile.EmailAddress?.GetValue();
DateTime? dateOfBirth = profile.DateOfBirth?.GetValue();
string address = profile.Address?.GetValue();
Dictionary<string, Newtonsoft.Json.Linq.JToken> structuredPostalAddress = profile.StructuredPostalAddress?.GetValue();
string gender = profile.Gender?.GetValue();
string nationality = profile.Nationality?.GetValue();
Yoti.Auth.Document.DocumentDetails documentDetails = profile.DocumentDetails?.GetValue();
bool? isAgedOver18 = profile.FindAgeOverVerification(18)?.Result();
bool? isAgedUnder55 = profile.FindAgeUnderVerification(55)?.Result();
// You can retrieve the anchors, sources and verifiers for each attribute as follows:
using System.Linq;
using System.Security.Cryptography.X509Certificates;
using Yoti.Auth.Anchors;
List<Anchor> givenNamesAnchors = profile.GivenNames.GetAnchors();
List<Anchor> givenNamesSources = profile.GivenNames.GetSources();
List<Anchor> givenNamesVerifiers = profile.GivenNames.GetVerifiers();
// You can also retrieve further properties from these respective anchors in the following way:
Anchor givenNamesFirstSource = profile.GivenNames.GetSources().First();
AnchorType anchorType = givenNamesFirstSource.GetAnchorType();
List<X509Certificate2> originServerCerts = givenNamesFirstSource.GetOriginServerCerts();
byte[] signature = givenNamesFirstSource.GetSignature();
DateTime signedTimeStamp = givenNamesFirstSource.GetSignedTimeStamp().GetTimestamp();
string subType = givenNamesFirstSource.GetSubType();
string value = givenNamesFirstSource.GetValue();