Our app can be seamlessly integrated with your website, app or custom product so you can perform secure identity checks. This is a Yoti App integration. You'll be able to request specific details from a users' Yoti app directly from your website or app.
The integrations steps are as follows:
Technical overview
The diagram below describes the login process and how a backend integrated with the Yoti architecture.
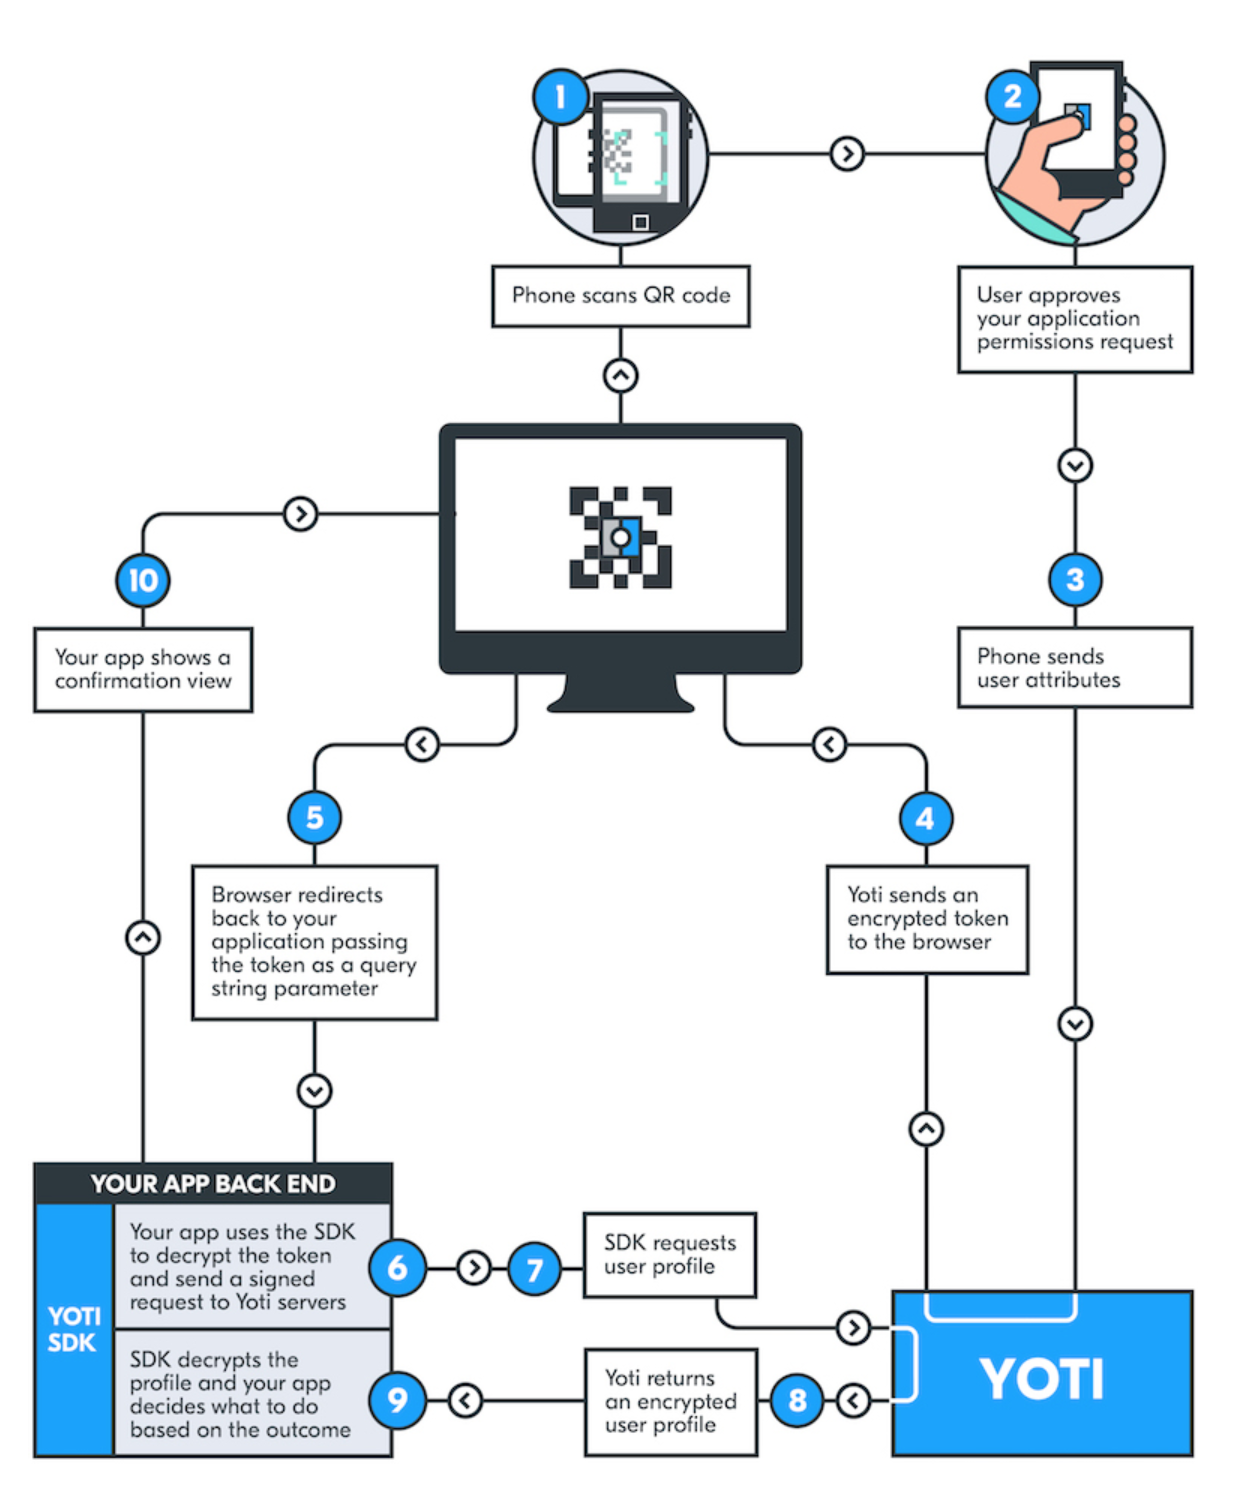
Backend integration process diagram
How it works
Integrating with Yoti lets your users securely share specific details using their Yoti app. We call these details attributes.
To get started, users need to click a Yoti button on your website or app. This button opens a full-page overlay on the webpage, showing the details users are about to share.
On a desktop browser
This overlay has a two-dimensional barcode that we ask users to scan with the Yoti app. We use these codes to securely pass on information; they're called Yoti QR codes.
On a mobile browser
Users simply need to tap the Share details button to continue. This will launch their Yoti app.
Both methods prompt the Yoti app to display the details users are about to share and a button to confirm the share.
If a user doesn't have the Yoti app, they'll be redirected to a mobile website with more information and download links.
Once they confirm the share, their details are securely sent to your organisation. You can access them through a backend integration or from your Yoti Hub.
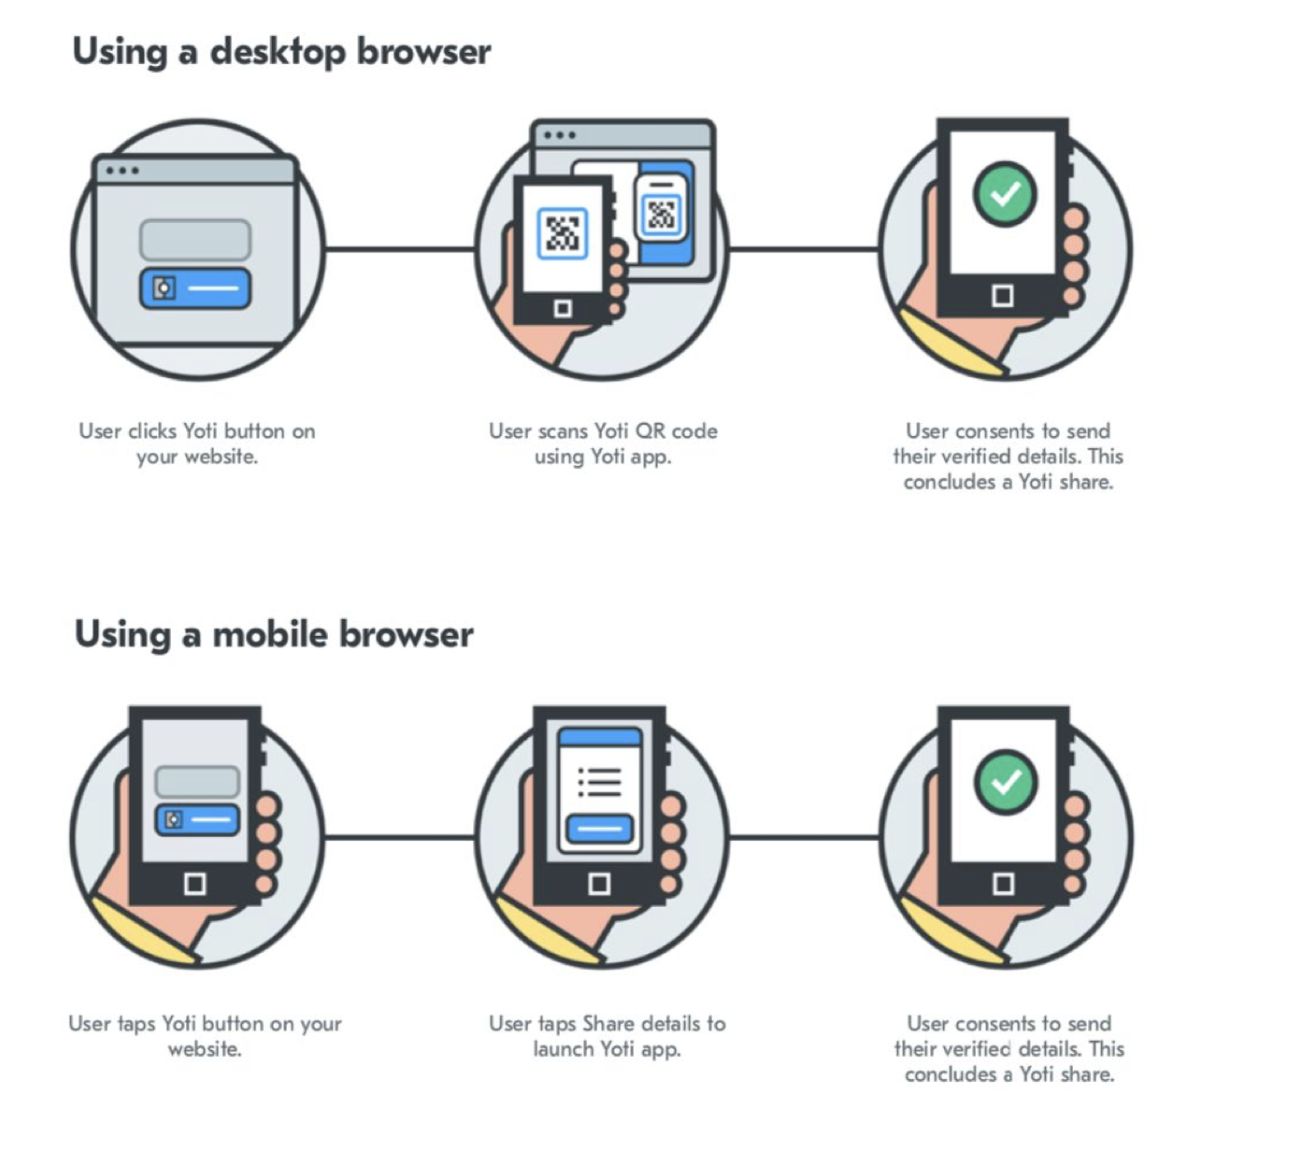
The steps users take on mobile and desktop.
What users will see
When your user clicks the Yoti button on your website or app, a full-page overlay appears. This tell them exactly what details they'll be sharing and who they'll be sharing them with.
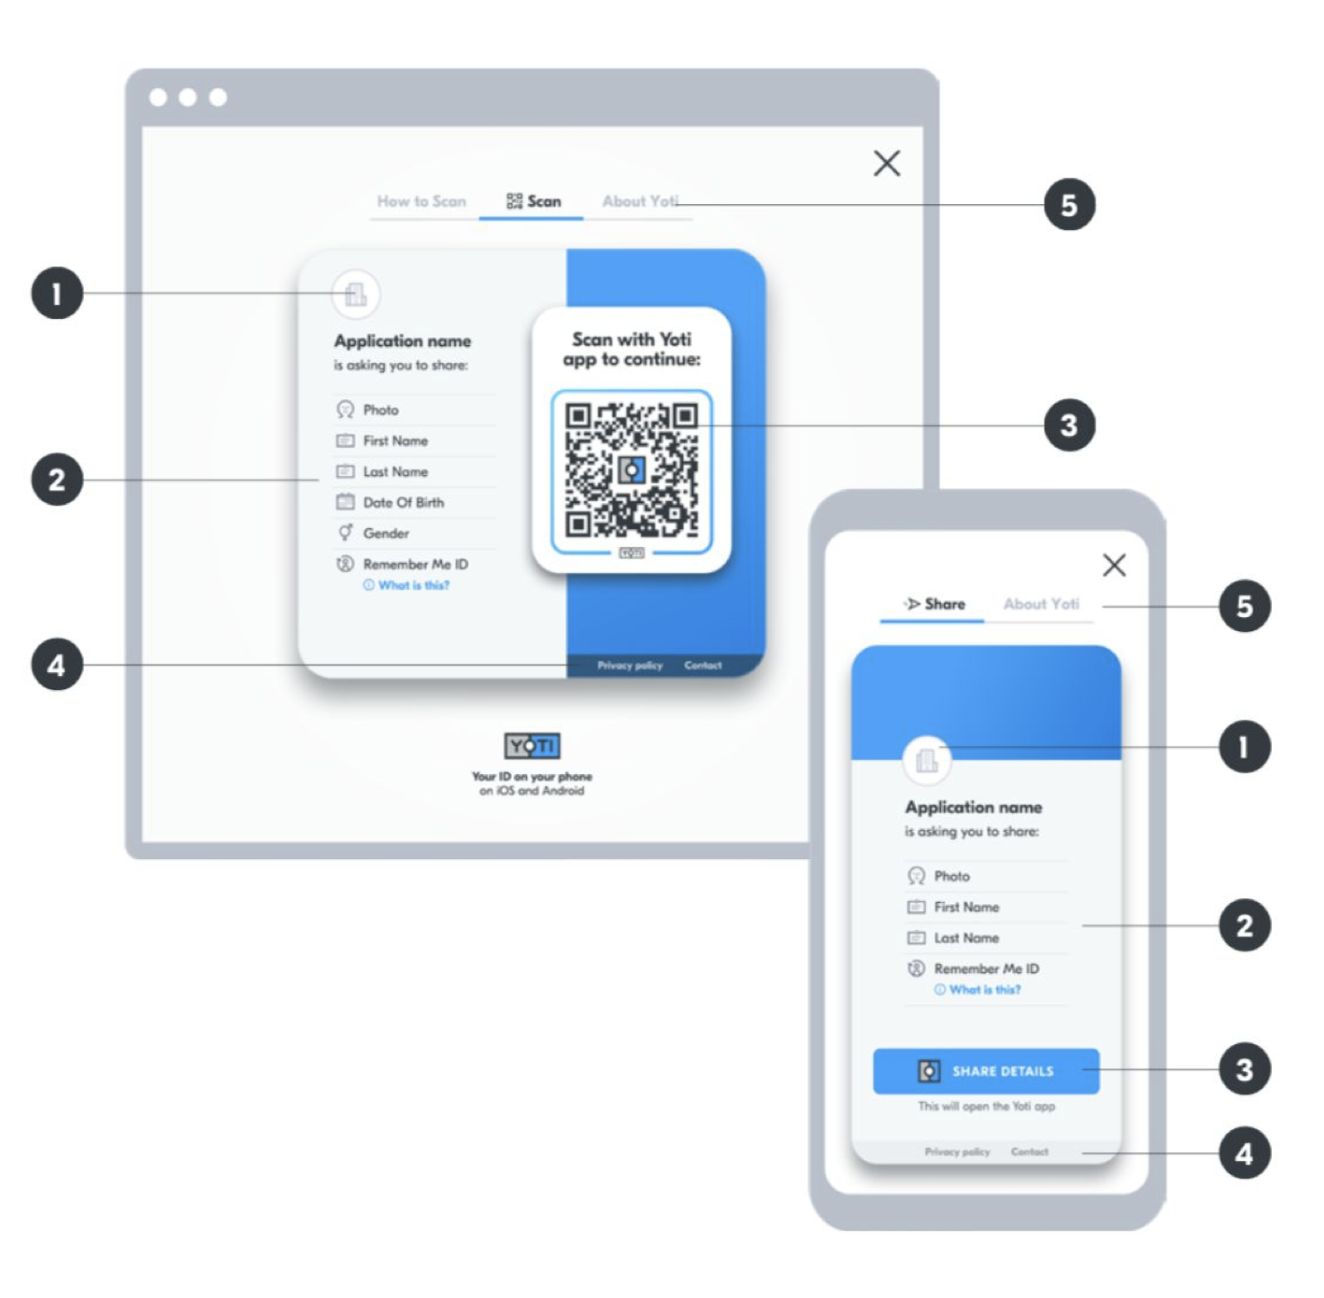
A diagram of our overlay with numbered areas
- Your application's logo and name. Make sure they match what's on the website or app your user has come from.
- The specific details you're requesting users to share.
- On desktop browsers: a Yoti QR code that users scan with their Yoti app. On mobile browsers: a share button that will automatically open the Yoti app.
- Your application's contact details and privacy policy. Make sure your provide these.
- More information for users to find out how Yoti works and how to share details.
Once your user has scanned the Yoti QR code on their desktop or tapped the Share details button on their mobile, the Yoti app automatically presents a share request screen.
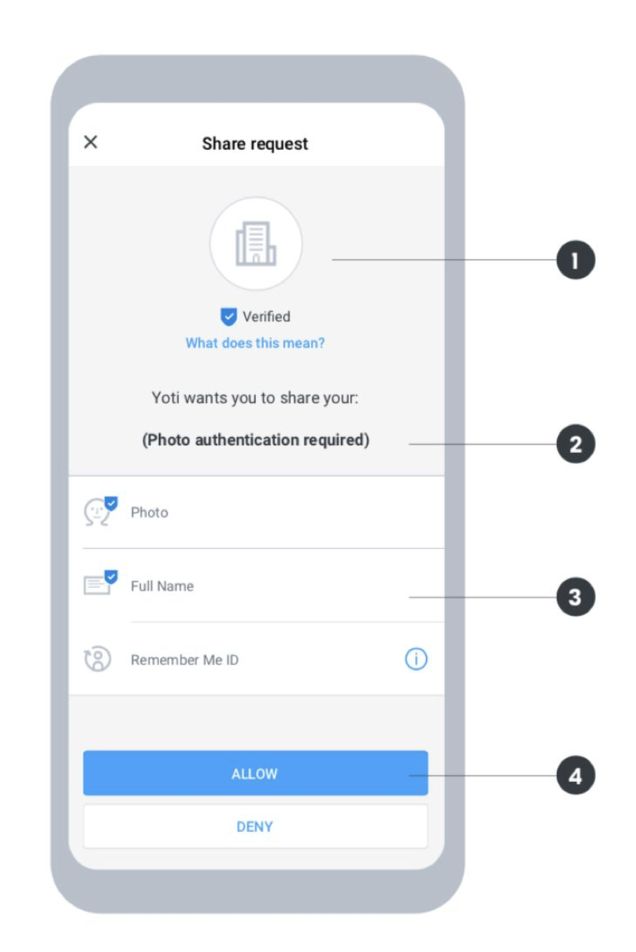
A diagram of our share details screen in the Yoti app with numbered areas.
- Your application's logo and name. Make sure they match what's on the website or app your user has come from.
- This will only show if you've requested photo authentication in Yoti Hub. If you request this, the user will be asked to scan their face using their front-facing camera.
- The specific details you're requesting users to share. Any details with a blue tick are verified by Yoti.
- Tapping Allow shares the requested details with your organisation. The user will then receive a share receipt in their Yoti app.
User journey overview
Yoti can be used in many different situations. It can be used in scenarios where someone would usually share personal, often private, information with an organisation or another person.

A diagram of a generic user flow using Yoti.
Using Yoti responsibly
We pride ourselves on how we handle our users' data. We use tech for good and enable users to securely prove their identity, always being transparent about what happens to their details.
- Be transparent about why you're collecting data and only use this data for those reasons.
- Only collect the information you actually need. Data minimisation is one of the main benefits of Yoti, giving people ownership of their data.
- Make sure the data you collect is stored securely.