Create optimal experiences for your customers and increase conversion by following these best practices for web and mobile integrations.
In this section, we offer tips and considerations to create a great and simple experience for your users.
General guidelines
We suggest people integrating with any Yoti products follow these suggestions
1. Only ask for the information you need.
We've found that people will be more likely to complete the process if they feel secure, and if they're being asked for a reasonable amount of details. For example, asking someone to scan their face when it won't provide any significant benefits may increase drop-off rate.
2. Be transparent with your customers.
When talking about identity details, keep your language simple and understandable. We've found that people are more likely to convert if they have confidence in what is happening to their data. We have plenty of examples of how to explain these differences on our website.
3. Explain your relationship with Yoti
As a third party company, it's important that your customers trust your faith in us. Be clear about how Yoti is helping you and in what ways. Showing that you trust Yoti will help people to share their identity details with confidence. There are specific pieces of information included to help people understand how it works. In your own FAQs, mentioning Yoti will add reassurance that you trust them.
Key user experience touchpoints
Key touchpoints
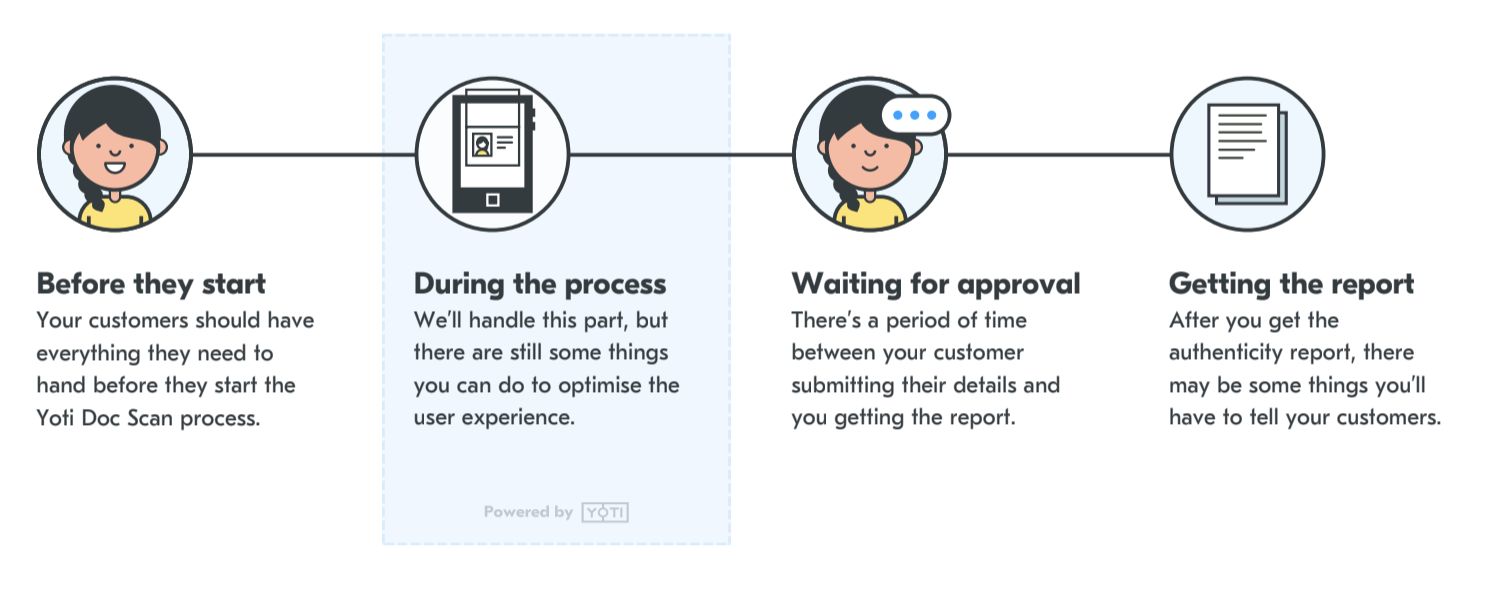
Before they start
Through multiple rounds of testing, we’ve found some easy ways to reassure people before they begin to prove their authenticity:
- Be transparent about where the information you're asking to collect is going to be stored and for how long.
- If you have an idea of how long the process will take let them know.
- If you're doing a document check, tell them that they will need to have an identity document to hand before they start.
- If you're doing a liveness check, let them know in advance that you'll need access to their camera to capture their face.
- Mention that you're using a trusted third party to perform the verification checks.

Before they start
During the process
Sending your personal details through a third party service can be an unnerving experience. We do all we can to ensure your customers’ comfort, but there are additional steps you can take to reassure them.
- Avoid interrupting someone whilst they're submitting their information. Mute things like notifications so they can remain focused.
- If you're embedding Identity verification in a page, hide or remove any content around the iframe that might distract someone. Things like adverts could also unnerve users and affect their level of trust.
- Handle any errors correctly and consistently. We explain more about errors in detail in a couple of chapters.
During the process
Waiting for approval
There will be a period of time after your customers submit their application where we’ll need to review their details. This process could take several minutes. During this time, you’ll need to keep your customer informed about the status of their application.
- Tell them that it could take a few minutes for the checks to be made.
- Give them an area where they can check the status of their application.
- When possible, allow them to continue using your service.

Waiting for approval
Getting the report
Once we’ve reviewed your customer’s application, you’ll be able to see the results of the check.
- If your customer has passed the check then let them know. This is best done either through email or via notifications if you use them.
- For customers who fail the check, give them an option to either try again or go through an alternative method.

Getting the report
Layouts
We have designed every screen within Identity verification to work seamlessly across browser windows of any size.
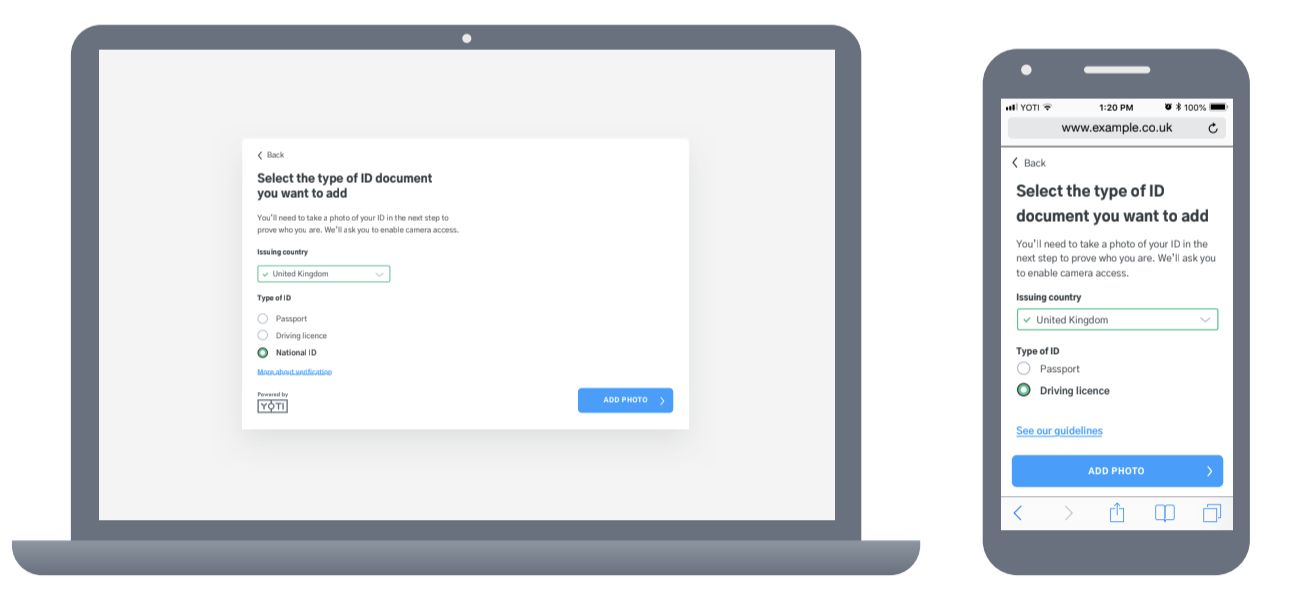
Identity verification layouts - Web and Mobile
Desktop browser layouts
Before we talk about breakpoints, it’s worth mentioning that we currently use two templates for content within Identity verification.
The common template is used for most screens. The main content takes up the full width of the modal. Primary navigation can be found in the bottom right or in the top left. Additional links can be located in the main content.
The activity template is reserved for specifications that require more focus. For example, the document capture process is performed using this template. The main actionable area is found on the right-hand side; supporting guidance and helpful links are on the left-hand side.
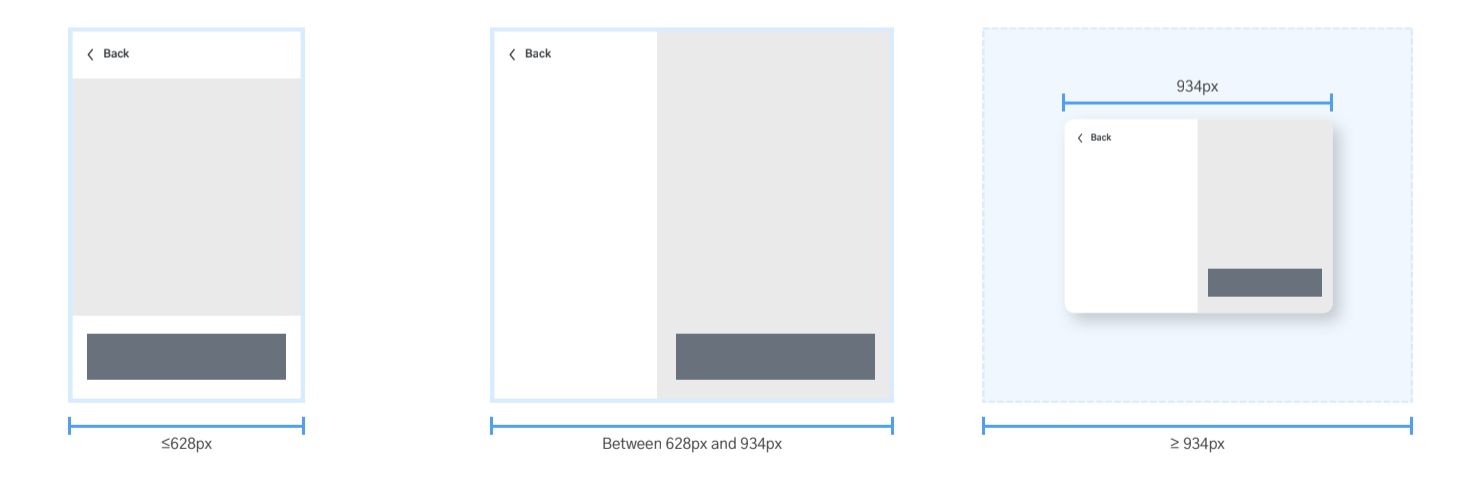
Web layout
Depending on the size of the browser window, the Identity verification frame will adapt to the space in a variety of ways.
For windows of width ≤628 px the view on desktop will change the mobile web layout. For window sizes between 628 px and 93 4px the frame contents will take on the desktop layouts, adapting to fit the space.
For windows of width ≥ 934 px the frame will remain a fixed size.
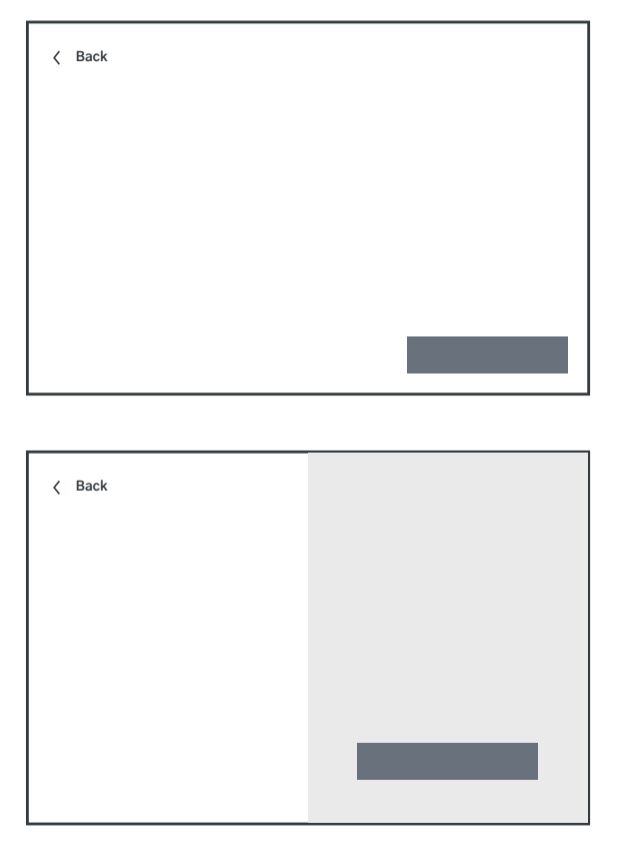
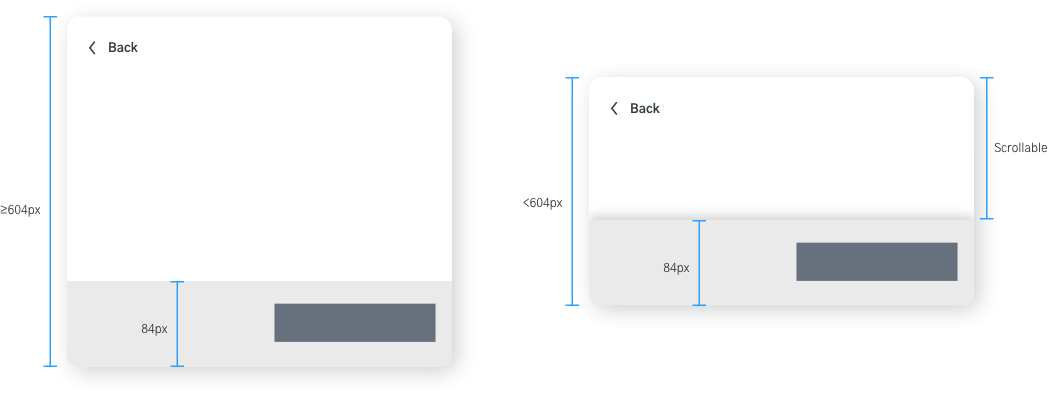
Breakpoints on desktop
We have a minimum size for desktop view: 604 px. If the frame is made larger than this then the modal will still only be 604 px in height. If the frame height is made smaller than 604 px, the contents become scrollable and the bar stays fixed to the bottom of the frame. Shadows are used to show that the content underneath the bar can be scrolled.
Sticky button
Mobile browser layout
On mobile browsers we can only display content in a single column. This common template is used for all screens.
This screen will sit within the browser window. Your customer will still be able to navigate using the native controls (eg, go back, close tab). The primary action button can usually be found at the bottom of the window; otherwise, it will be clearly visible within the page content.
It is recommended to make the container height fit within the available page screen size. Any scrolling should occur within the iFrame, making the iFrame larger than the page size will cause the whole page and iFrame to be scrollable.
Mobile layout
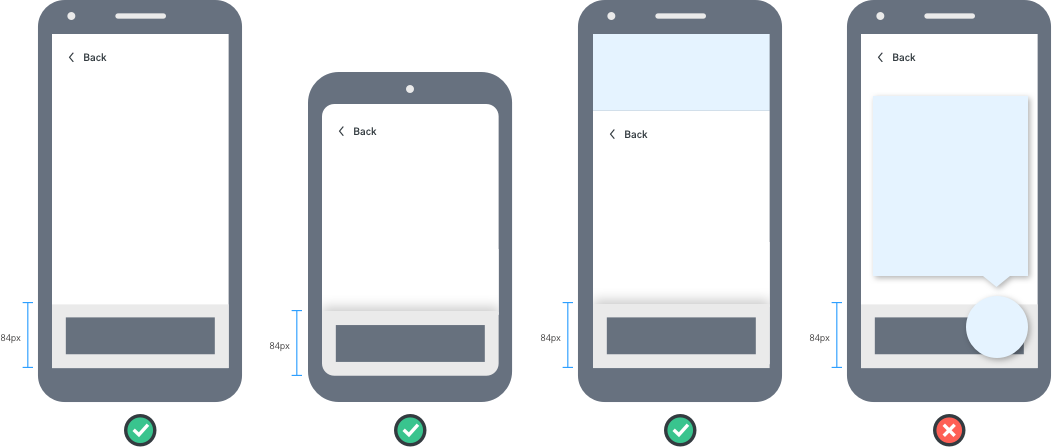
Sticky buttons on mobile devices make actions clear to users no matter their screen size. The content in the main window area will remain scrollable behind the button. The button area is a fixed height of 84 px and is fixed to the bottom of the frame.
If there is content above the iframe in the window, the content in the frame will be pushed into a smaller vertical space as the button stays fixed to the bottom of the frame. If you have content overlaying the iframe, the button may be covered or obscured. Please make sure that your site’s content does not obscure the iframe’s space.
Sticky button - Mobile
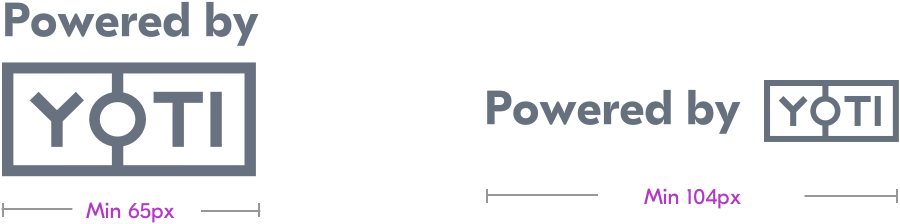
Powered By Yoti
Users who choose Yoti Identity Verification will be shown our persistent ‘Powered by Yoti’ mark. This should remain on-screen for the duration of the Identity Verification.
Please do not alter or create your own asset. Please contact us with regards to assets through our support form. You will need to provide a powered by Yoti logo on your Identity Verification service.
Error handling
Throughout the Identity verification process, your customers can encounter several types of errors. This is a quick guide on where these errors occur in the flow and how best to handle them.
There are several instances where someone can be forced out of the Identity verification SDK; when this happens we’ll redirect to the error URL you provide in your configuration.
On this page, we suggest you provide the following:
- Reassurance that the fault is with the system, not them.
- Give them an easy way to begin the process again from the error page.
- Also give them an alternative way to prove their identity (eg, a video call with a customer support representative).
Generic errors

Generic errors
| Reason for failure | Suggested action |
|---|---|
| They cancelled the session for an unknown reason. | Start the session again |
| Their session was configured incorrectly. | Start the session again |
| Something went wrong during a network request. | Check their connection and try again. |
| There was a network error | Check their connection and try again. |
| Their session timed out | Start the session again |
| Your SDK is out of date | Try a different verification method. Update your SDK to the latest version. |
Document capture errors
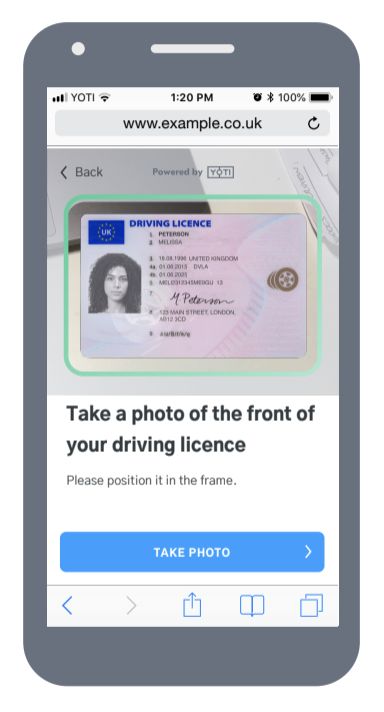
Document capture check
There are some specific errors that can only be thrown during the document capture process:
| Reason for failure | Suggested action |
|---|---|
| They did not grant permissions to the camera | Start the session again, They will be asked to grant permissions again. |
| They do not have a camera on their device. | Try a different verification method. |
| The document upload process failed too many times | Start the session again, or offer an alternative verification method. |
Liveness check errors
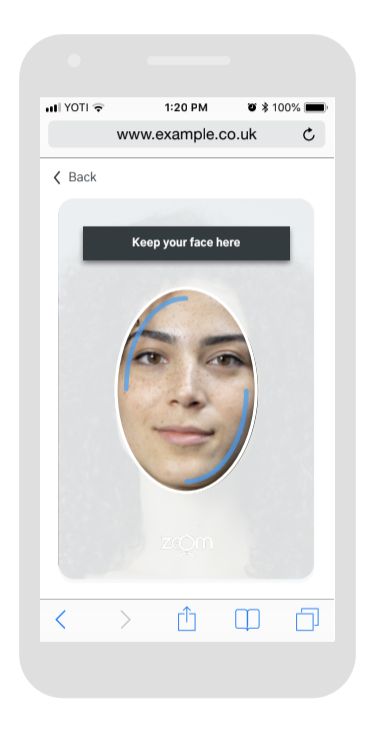
Liveness check
Some specific errors can only be thrown during the liveness process:
| Reason for failure | Suggested action |
|---|---|
| They did not grant permissions to the camera. | Start the session again. They will be asked to grant permissions again. |
| They couldn't pass the liveness test. This is either due to user error or them attempting to spoof the check. | Try a different verification method. |
| They do not have a camera on their device | Try a different verification method. |